Vegan Pistachio Truffles

I love pistachios!  How about you?  I swear my daughter could put away a whole bag of pistachios if she didn’t have to shell them.  We bought a bag the other day and I instantly thought about doing a pistachio truffle recipe.  So that is how these pistachio truffles came about.

Pistachio Truffles Watermark

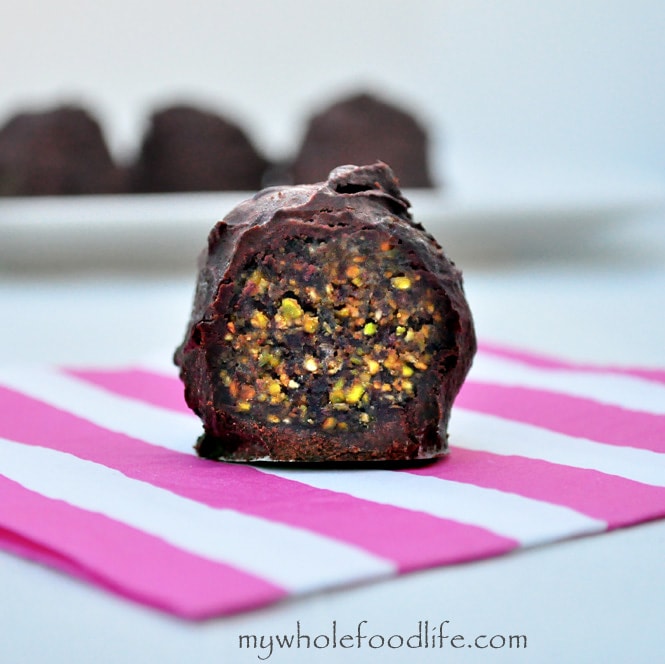
These truffles are date sweetened except for the small amount of sugar there is in the dark chocolate I used.  They are pretty awesome too.  Kind of reminds me of my coconut truffles a bit.  It’s a great little bite when you have a chocolate craving.  These truffles are also vegan, gluten free and paleo.
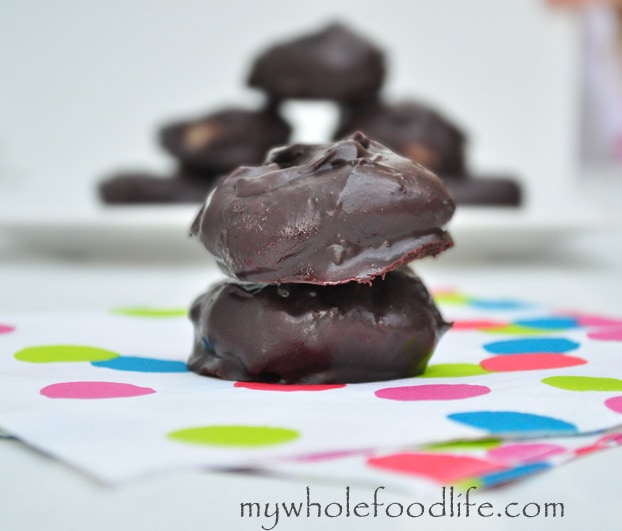
Pistachio Truffles

Pistachio Truffles

Prep Time 1 hr Serves 8-10 truffles     adjust servings

Ingredients

    For the filling

    For the chocolate coating

    Instructions

      For the filling

      1. In the food processor , pulse the pistachios into a course ground consistency.
      2. Then add the remaining ingredients until a “dough” starts to form.
      3. Roll into balls and place in the freezer to set. I put mine on a parchment lined plate. Leave them in there for about 30 minutes.

      For the chocolate coating

      1. While the balls are setting, make the chocolate coating.
      2. Using a double boiler method, melt the chocolate, coconut oil and milk.
      3. Keep stirring until the chocolate becomes thinner and smooth.
      4. Once the chocolate is ready, remove from heat and get the balls out of the freezer.
      5. Using two forks, gently roll the balls into the chocolate and set them back on the parchment lined plate.
      6. Once all the balls are coated, place them back in the freezer to firm up.
      7. They should be ready in about 30 minutes.

      by

      Recipe Notes

      You can store them in the fridge or freezer. Whichever is your preference. I got about 8-10 balls out of my batch. Enjoy!

      Special Birthday Cookies

      On the 24th, my daughter Meadow turned 4.  She goes to pre-school and they celebrate birthdays.  So I made some special birthday chocolate chip cookies to take to her class. Let me say that there is some processed sugar in these.  Not much, but I bent my normal rules because it was her birthday treat.  I do allow my children to have treats once and a while, and a birthday is an occasion where a healthy chocolate chip cookie recipe that bends the rules a little is in order.

      Birthday Cookies watermark

      This healthy chocolate chip cookie recipe would be a great transition for those looking to eat healthier versions of sweets.  It’s sweeter than I normally would make, but if you are used to super sweet cookie recipes, this one is a great stepping stone.  Everyone loved them.  They are also gluten free and nut free!

      Special Birthday Cookies

      Special Birthday Cookies

      Prep Time 10 min Cook Time 15 min Serves 19 cookies     adjust servings

      Ingredients

      Instructions

      1. Preheat oven to 350.
      2. Mix all the dry ingredients in one bowl.
      3. Mix wet in another.
      4. Add wet to dry and mix until everything is combined.
      5. Drop cookies on lined baking sheets and bake for about 13-15 minutes.
      6. I got 19 cookies out of my batch. Enjoy!

      by

      Chocolate Peppermint Bites

      My husband was a huge fan of junior mints.  They are kind of off limits now that he is vegan and eats no processed foods.  So I decided to try and make a minty treat he could enjoy. Chocolate peppermint bites.  These Chocolate Peppermint Bites came out great, and you can think of them like a a homemade junior mint recipe!

      chocolate peppermint bites watermark 2

      I think he was pretty pleased with the way these turned out.  They are so easy to make too.  Just a few minutes to throw together and then some time to chill in the fridge.  I rolled mine into big balls, but you can do bite sized ones as well.  These would be a perfect dessert for holiday parties too!

      Chocolate Peppermint Bites

      Chocolate Peppermint Bites

      Chocolate Peppermint Bites

      Serves 12 large peppermint balls     adjust servings

      The perfect treat for holiday parties!

      Ingredients

        For the balls

        For the chocolate coating

        Instructions

        1. In the food processor , mix the shredded coconut and the dates.
        2. Once they are blended, add in the peppermint extract and milk.
        3. Carefully roll the mixture into balls. It will be loose and feel like it doesn’t want to stick together, but trust me, it will firm up in the fridge.
        4. Set the balls into a small baking sheet covered with parchment paper .
        5. Put the balls in the fridge to chill. I waited about 30 minutes.
        6. While the balls are chilling, make the chocolate mixture.
        7. Heat all the chocolate ingredients in a saucepan , and stir until smooth.
        8. Using two forks, roll each ball in the chocolate mixture and set back on the baking sheet .
        9. Once done with all the balls, place them back in the fridge to set up.

        by

        Recipe Notes

        I got about 12 large balls out of my batch. You can store them in the fridge or freezer. Enjoy!

        Almond Butter Chocolate Overnight Oats

        This Almond Butter Chocolate Overnight Oats is the ultimate indulgence in your daily breakfast.  The best part?  It’s totally healthy!

        Yes that’s right. This healthy breakfast is made with good for you ingredients like almond butter, cacao powder and steel cut oats.


        Almond Butter Chocolate Overnight Oats


        This is one of the easiest breakfasts you can make yourself.  I make 5 at a time and eat them all week.  My husband even takes them to work with him.  They travel very well.  Between the chia seeds and the cacao powder, you are getting a lot of antioxidants.

        Also a lot of protein and fiber!  This will keep you full until lunchtime.   If you don’t know what cacao powder is, it is chocolate in it’s most raw form.

        It can be bitter, but it’s so good for you.  I usually put a chopped medjool date in my oatmeal and it turns into a caramel overnight.  It gives just a hint of sweetness.  You can also use maple syrup.

        Some other overnight oats flavors to try:

        Almond Butter Chocolate Overnight Oats

        Almond Butter Chocolate Overnight Oats

        Prep Time 10 min Serves 1 serving     adjust servings

        Ingredients

        Instructions

        1. Throw everything in a jar
        2. Mix well and store in the fridge overnight to eat.

        by

        Recipe Notes

        My recipe makes a thicker oatmeal. If you like yours thinner, just add a bit more milk. Take out in the morning and enjoy. I eat mine cold right out of the fridge. You can also try my Overnight Oats in a Jar.

        Chocolate Peanut Butter Fudge (Vegan)

        Chocolate Peanut Butter Fudge that is vegan and gluten free.   I have 5 words for you Chocolate Peanut Butter Vegan Fudge.  Yes.  You heard that right.

        You can make a clean eating peanut butter fudge.  A little bite of heaven that melts in your mouth.  Who doesn’t like chocolate and peanut butter, right?  This healthy fudge recipe is super simple to make!


        Chocolate Peanut Butter Fudge

        When I first created my Coconut Almond Fudge, my husband told me it would be awesome with some chocolate.  So this recipe was born. Let me be the first to tell you, it’s freaking amazing.

        If you are a chocolate and peanut butter fan, you will love this chocolate peanut butter fudge!   These are very rich and decadent, so one will satisfy your sweet craving – maybe even 1/2 of one.

        The recipe makes a lot, so freeze whatever you don’t want to eat in the first week or so.  It would also be equally delicious made with almond butter.  I like to keep mine in the freezer for when I want a super rich dessert.

        Looking for more fudge recipes?

        Chocolate Peanut Butter Fudge

        Chocolate Peanut Butter Fudge

        Prep Time 5 min Cook Time 60 min Serves 12     adjust servings

        This fudge is melt in your mouth delicious!

        Ingredients

        Instructions

        1. In a medium saucepan , mix all the ingredients on medium heat and stir until everything is combined. It should take a few minutes to combine and I suggest stirring it the whole time.
        2. Once the mixture is smooth and combined, transfer to muffin pans with liners .
        3. Store in the fridge to firm up. I used standard sized, but mini muffin pans would work well too.

        by

        Recipe Notes

        I’m not going to lie, this recipe is a good arm workout to make, but is well worth it. You will not disappointed. They can be frozen as well! Enjoy!

        Raspberry Nutella Tarts

        I have said this before, but growing up with a German mother meant we ate a lot of Nutella.  I loved it as a child.  Now I know that store bought Nutella is very unhealthy.  So I have created my own Healthy Homemade Nutella.  I have used it in many dishes on this blog.  Now it is time for a Raspberry Nutella Tart.

        Nutella Tart 2 watermark

        We all need to enjoy a tart every once and a while.  I love them and they are perfect for summer.  There is no cooking involved!  These are completely raw.  They are also vegan, grain free and gluten free!  If you feel compelled to cook the crust, you can.  You just don’t need to.  These are very easy to make even though they look kind of fancy.

        Raspberry Nutella Tarts

        Raspberry Nutella Tarts

        Prep Time 30 min Serves 5 tarts     adjust servings

        Ingredients

          For the crust

          For the filling

          For the fruit

          • 2 cups fresh raspberries or strawberries

          Instructions

            For the crust

            1. In a food processor , grind up the almonds until they are a course consistency.
            2. Once they are ground, add in the dates and water until the dough comes together. If you are not using a high powered food processor , you might want to soak the dates for 5 minutes in water to soften them.
            3. Grease your tart pan or mini tart pan s and then press the dough into the pan and up the sides. The dough will be sticky and I find that working with wet hands helps.
            4. Once the dough is set into all the tarts, place them in the fridge to firm up. About 30 minutes.

            For the filling

            1. While the tarts are setting up, you can make the filling. In the food processor , grind up the hazelnuts into as fine of a powder you can get them.
            2. Once they are ground, add in the remaining ingredients. If the mixture seems too thick, you can always add a bit more milk.
            3. Once the crusts are set, spoon the filling into each one and top with the fruit.
            4. Enjoy!

            by