Fruity Lemonade

Who doesn’t like a refreshing cold drink in the summer?  I know I love it on hot days like today.  Problem is, most store bought mixes are laden with processed sugar and chemicals.  Take a look at the ingredients in this Country Time Lemonade that I got off their website.  Did you notice how there are no actual lemons in the ingredients???  There are, however, lots of other unwanted additives.  I have highlighted some of the nastier ones.

95119cf

Ingredients: SUGAR, FRUCTOSE, CITRIC ACID, CONTAINS LESS THAN 2% OF MALTODEXTRIN, NATURAL FLAVOR, ASCORBIC ACID (VITAMIN C), SODIUM ACID PYROPHOSPHATE, SODIUM CITRATE, MAGNESIUM OXIDE, CALCIUM FUMARATE, SOY LECITHIN, ARTIFICIAL COLOR, YELLOW 5 LAKE, TOCOPHEROL (PRESERVES FRESHNESS). CONTAINS: SOY.

You can almost guarantee that the soy products contain
GMOs.  This is easy to make and much better!

lemonade watermark

If you don’t want a drink, you can make these into popsicles using these molds.  I made mine using a juicer, but you can use a blender and strain if you like, or just make it into a lemonade smoothie!  I got the idea for this after I saw all the fruits that came in my co-op basket.
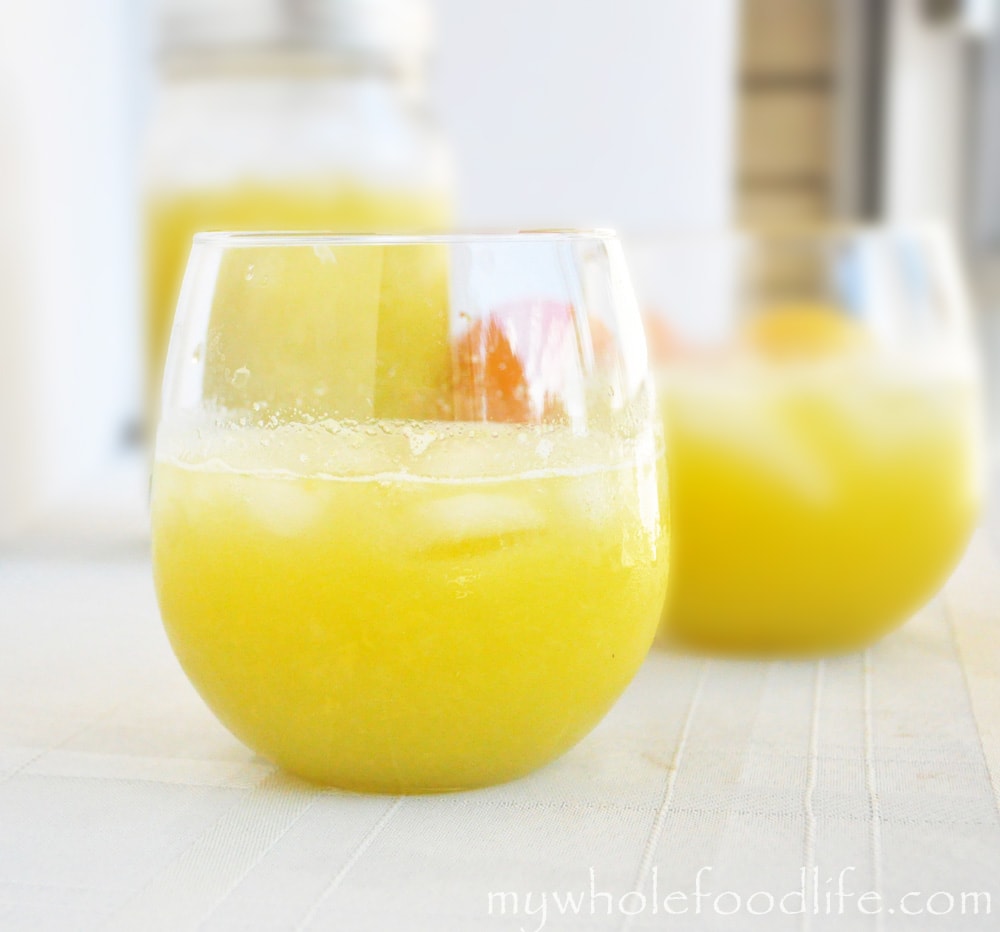
Fruity Lemonade

Fruity Lemonade

Prep Time 5 min

Ingredients

  • 2 lemons (remove rinds, but leave as much white as possible)
  • 3 mangos (skins removed and pitted)
  • 4-5 cups honey dew melon cubed
  • 1-3 T of raw honey or maple syrup

Instructions

  1. If you are using a juicer , juice all ingredients except for the honey.
  2. Take a taste.
  3. Add 1-3 T raw honey or maple syrup depending on how sweet you like it. I personally love the tarty flavor.
  4. If you are using a blender juice the lemon separately.
  5. Add the rest of the fruit and the sweetener into the blender with the lemon juice.
  6. Blend for about 90 seconds.
  7. Serve immediately or store for later. I got about 32 oz of juice out of mine. Enjoy!

by

Healthy Key Lime Tarts (Vegan and Paleo)

Healthy Key Lime Tarts.  One of the things I think of during summer is healthy key lime tarts.  I knew I had to find a way to make a healthy key lime vegan tart recipe.

My father-in-law loves all things key lime and he loved this key lime tart recipe!  I had him come over and taste test them.  If you like my Key Lime Larabars, you will love these key lime tarts!


Healthy Key Lime Tarts


I had soaked some cashews because I was making some Smoky Sweet Potato Tacos and the recipe called for a maple cream.

I thought they were plenty sweet and didn’t end up making the cream part.  The tacos were bomb though!

I used the extra cashew cream in this recipe. These little tarts are vegan, grain free, gluten free and raw.  I hope you enjoy them as much as we did.

Healthy Key Lime Tarts

Healthy Key Lime Tarts

Prep Time 2 hr Serves 5 - 6 servings     adjust servings

Ingredients

    For the crust

    For the filling

    Instructions

      For the crust

      1. Soak the cashews overnight and then drain and rinse.
      2. In the food processor , grind up the salt, almonds and pecans until they are a course/crumbly texture.
      3. Add the dates and pulse until a dough starts to form. You may need to add a couple tablespoons of water or oil if the dough is not holding well.
      4. Press the dough into individual greased tart pans . I have the kind with the removable bottoms. Makes it real easy to remove them afterward. I got five out of my batch. It helps to use wet hands while forming the dough into place.
      5. Once all the dough is formed in the cups, place in the fridge for 30 minutes to firm the dough back up.

      For the filling

      1. While the dough is firming back up, you can start on the filling. Throw the cashews, coconut milk, sweetener and lime juice in a blender and blend until smooth. I used my Vitamix . Take a taste. If you like it a little more tart, add some more lime juice.
      2. Pour the contents into the tart shells and let chill in the fridge for a couple hours. That’s it!

      by

      Thick and Fudgy Brownies

      My husband is a huge chocolate lover.   He especially loves fudgy brownies.  I am more of a nut butter girl myself.  So I combined those two things to make these yummy thick and fudgy brownies!  This is attempt number 3 at brownies and these brownies came out so good!  I used white whole wheat in my brownie recipe, but they can easily be done with a gluten free flour as well.

      brownies FG 10

      These can also be done with peanut butter or sunflower butter as well.  I knew these were a hit because my daughter ate hers right up and asked for another.  My husband said they reminded him of Duncan Hines brownies in a box!.  Without the chemicals of course! I used dark chocolate and cacao powder so these are filled with healthy antioxidants for your body too. A brownie you can feel good about eating. Can it get any better than that really?

      Thick and Fudgy Brownies

      Thick and Fudgy Brownies

      Prep Time 15 min Cook Time 15 min Serves 10 brownies     adjust servings

      Ingredients

      Instructions

      1. Preheat oven to 350.
      2. In a large bowl , add all the dry ingredients.
      3. In a saucepan , on medium heat, combine the coconut oil, applesauce, maple syrup, almond butter and chocolate.
      4. Stir until everything is well combined. Set aside.
      5. Line an 8X8 pan with a sheet of parchment paper leaving enough room for some paper to come out the sides. This will make the brownies easy to remove.
      6. Add the heated mixture to the dry ingredients and stir only until combined.
      7. Lastly add the egg and milk and stir until everything is mixed well. Be careful not to over-mix or the brownies can come out tough.
      8. Bake in the oven for about 15 minutes. I kept mine slightly gooey and they worked out great that way. The first time I overcooked them and they were so dry.
      9. Once the brownies are cooled, pull them out by grabbing the parchment paper.
      10. Cut with a pizza cutter into squares.

      by

      Recipe Notes

      Store them in a container in the pantry or the fridge. Keep in mind, if you store them in the fridge, they will harden slightly because the coconut oil will solidify. I got about 10 brownies out of my batch. Enjoy!

      Almond Joy Cookies

      If you have been following this blog for quite some time, you know that I love to bake.  Before I started to eat clean, I loved to bake all of those decadent gooey desserts that you see on sites like Pinterest.  Changing my diet has taught me to be creative in baking healthier sweets.  My husband is a big fan of almond joy, so he had the idea to make almond joy cookies.

      almond joy cookies watermark

      These cookies were inspired by my Almond Joy Energy Bites.  They are gluten free as well as vegan.  My husband worked from home yesterday and he got to taste test them right out of the oven.  To quote him verbatim, “These may be the most delicious things you have ever made.”  So I had to share them with all of you!

      Almond Joy Cookies

      Almond Joy Cookies

      Prep Time 10 min Cook Time 12 min Serves 12 cookies     adjust servings

      The taste of the candy bar with none of the guilt.

      Ingredients

      Instructions

      1. Preheat oven to 350.
      2. Mix all the dry ingredients in one bowl.  (I actually ground up some rolled oats to make my oat flour.)
      3. In a saucepan on med heat, combine the almond butter, coconut oil and maple syrup and stir until smooth.
      4. Let mixture cool.
      5. Once it’s cooled add it to the dry ingredients and also add the vanilla, egg and almond extract.
      6. Once everything is well combined, fold in the dark chocolate.
      7. Drop cookies onto a lined baking sheet. 
      8. Bake for about 12 minutes and serve.

      by

      Recipe Notes

      Store them in a jar if they will be eaten quickly. For longer storage, keep them in the fridge or even freeze them . Enjoy!

      Healthy Toddler Crackers

      My kids love animal crackers.   Problem is, I have never been able to find a store bought brand with a super clean ingredient list.  Sure you can buy GMO free animal crackers at Trader Joes and Whole Foods, but even their brands have too much sugar for me.  So when Wholesome Sweeteners sent me a sample of all their products, I decided to use their coconut palm sugar in this recipe.

      toddler-crackers-3-watermark-998x1024 blur

      Ideally, I would have liked to make these in animal shapes, but I didn’t have an animal cookie stamp.  I found this one on Amazon and ordered it, so I will make these again once it comes in the mail.  For now, these are just cut into tiny squares.  Since these cookies are for toddlers, I made them only mildly sweet.  My daughter loved them and I hope your kids do as well.

      Healthy Toddler Crackers

      Healthy Toddler Crackers

      Prep Time 20 min Cook Time 30 min

      Ingredients

      • 1 1/2 cup rolled oats
      • 1 cup spelt flour (for a GF option, try using GF all purpose)
      • 1/3 cup Wholesome Sweeteners coconut sugar
      • 1/3 cup unsweetened applesauce
      • 1/4 cup coconut oil
      • 2 flax eggs (I used a flax egg replacer)
      • 1/2 tsp baking powder
      • 1 tsp ground vanilla bean or vanilla extract
      • 1 tsp cinnamon
      • 1/4 cup milk (I used oat milk)

      Instructions

      1. Preheat oven to 350. 
      2. In a food processor, grind up the oats into a coarse crumb-like texture. 
      3. Add them to a bowl with the rest of the dry ingredients. 
      4. Add all the wet ingredients into another bowl. 
      5. Add dry to wet and mix only until combined. 
      6. Gather the dough into a ball and wrap in plastic.  It may be a bit sticky. 
      7. Stick dough in the fridge for at least 30 minutes to firm up a bit. 
      8. While the dough is firming, cut two sheets of parchment paper the size of your baking sheets
      9. Using a bench scraper, cut the dough in half. 
      10. Lay the parchment paper down on the counter.
      11. Place the plastic wrap you had the dough wrapped in between the rolling pin and the dough.  By doing this, you will be able to roll the dough out very flat and it will not stick to the counter or the rolling pin.  It will also make for easy transport to the baking sheets
      12. Roll the dough as flat as it can get and transfer to the baking sheet. 
      13. Repeat the same steps with the second half of the dough. 
      14. Before you place the dough into the oven, score it for easy cutting once it’s baked.  I used a pizza cutter to make squares. 
      15. Bake for about 15 minutes. 
      16. Remove the pans and very carefully, flip the pieces over.  If you have scored the dough beforehand, they should easy break into little pieces. 
      17. Put back in the oven for another 15 minutes, carefully watching them to make sure they don’t burn.

      by

      Recipe Notes

      If you have really young children, you may want to bake them a little less so they can easily be chewed. I filled a large mason jar with the crackers I made. Enjoy!

      Almond Joy Granola Recipe

      Almond Joy Granola.  I have been slightly obsessed with coconut lately if you haven’t noticed.  You need to try this Almond Joy Granola!   What’s not to love?  I was not always a coconut fan, but have grown to love it in so many ways.

      I already have Almond Joy Energy Bites and Almond Joy Waffles, so why not create Almond Joy Granola.  I have combined my love for coconut, with my love for granola to make this very tasty little snack.  This almond joy granola is a must try!


      almond joy granola


      This is so good!  It may just be my new favorite.  I have to admit, though, this recipe was not going to be granola.  I was trying to do a baked oatmeal and when I went to pull them out of the muffin tins, they just fell apart.

      But rather than toss it, I just threw it back in the oven for another 15 minutes and made it granola!  Glad I did too, because the coconut got toasty and sweet.  Yum!

      We shot a short video for this recipe.   You can view it below.  For more videos, you can subscribe to my You Tube channel.

      Almond Joy Granola

      Almond Joy Granola

      Prep Time 10 min Cook Time 15 min Serves 2.5 cups     adjust servings

      Ingredients

      Instructions

      1. Preheat oven to 350.
      2. Mix all the dry ingredients in one bowl . Mix wet into another.
      3. Add wet to dry and mix until combined.
      4. Spread mixture onto a lined baking sheet .
      5. Bake in the oven for 17 minutes.
      6. Pull out and shake granola around and put back in the oven for another 15-17 minutes. Enjoy!

      by

      Almond Joy Granola