Pumpkin Chocolate Cups

Get ready for another pumpkin recipe!  I have been trying to think outside the box a bit for these pumpkin treats.  This pumpkin chocolate cup is one little dessert I came up with, and they are simply amazing.  If you like pumpkin, are looking for a sweet pumpkin dessert recipe, then this recipe is for you.

Pumpkin Pecan Cups Waterrmark

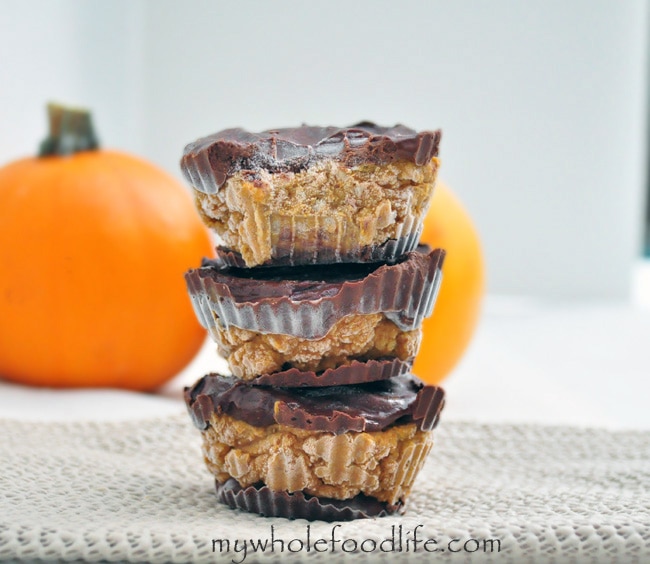
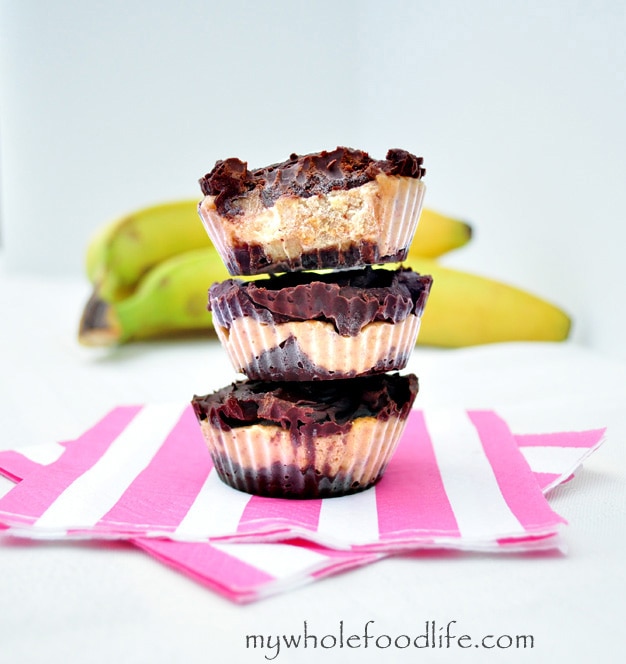
Instead of adding a lot of sugar to the pumpkin mixture, I mixed it with pecans, spices and only a small amount of maple syrup.  I think it gives the filling a naturally sweetened taste.  These are very easy to make as well.  Vegan, gluten free and paleo.  If you enjoy these you may also enjoy my Clean Eating Peanut Butter Cups or my Banana Chocolate Almond Cups.

Pumpkin Chocolate Cups

Pumpkin Chocolate Cups

Prep Time 15 min Serves 6 cups     adjust servings

Ingredients

Instructions

  1. In a food processor , blend up the pecans into a fine meal.
  2. Then add the pumpkin, maple syrup and spices and continue to pulse until everything is well mixed. Set aside.
  3. In a small saucepan, melt the chocolate and milk on med-low heat. Stir often until the chocolate becomes smooth.
  4. Get a standard sized muffin tin and place some liners into it. I use silicone liners to make the removal super simple.
  5. Place a small amount of chocolate into the bottom of each cup.
  6. Stick the muffin pan in the freezer for 10 minutes.
  7. Once it’s frozen, add the pumpkin/pecan mixture and then top the cups with more chocolate.
  8. Stick back into the freezer for a few hours to firm them up.

by

Recipe Notes

I got 6 cups out of my batch. You can also use a mini muffin pan if you want to make more. I noticed the cups are a little too hard when I went to eat them straight out of the freezer. However the filling is too soft if they are kept in the fridge. I would advise you to let it sit for 5 minutes outside the freezer before you go to eat it. Then it would be perfect. I hope you enjoy these as much as my family did.

Chocolate Almond Banana Bites (Vegan)

Chocolate Almond Banana Bites.  These chocolate almond frozen banana bites are so good! I wanted to incorporate the flavors of my 5 minute banana ice cream, which I seem to make at least a few times a week.

These frozen chocolate treats are so healthy and it feels like you are cheating!  No ice cream maker necessary!

This recipe actually won a contest on The Today Show.

Chocolate Almond Banana Bites

These chocolate almond banana bites contain no added sugars, except for the small amount of sugar in the dark chocolate.   They are a great banana chocolate dessert to keep in your freezer when you have that sweet craving.

I used standard sized muffin cups to make mine, but you can also use mini cups and make a larger, bite-size batch.

Looking for more frozen treats?

Chocolate Almond Banana Bites

Chocolate Almond Banana Bites

Serves 6     adjust servings

Satisfy your sweet tooth with this healthy treat!

Ingredients

Instructions

  1. In a small bowl, mix the banana, vanilla and almond butter.
  2. Mash it together well and set aside.
  3. In a saucepan, , melt the chocolate and almond milk on medium heat, stirring constantly.
  4. Once you get a smooth chocolate, add a small amount to the bottom of a lined muffin tin.
  5. I used silicone muffin liners to make removing the chocolate easier when it’s time to eat.
  6. Once you have placed chocolate at the bottom on each cup, stick it in the freezer to firm up. About 10 minutes.
  7. Once the chocolate is firm, add in the banana filling and then cover the top with more chocolate.
  8. Repeat these steps until all are done.

by

Recipe Notes

Using standard sized muffin cups, I got 6 out of my batch. I store them in the freezer. Enjoy!

Raspberry Nutella Tarts

I have said this before, but growing up with a German mother meant we ate a lot of Nutella.  I loved it as a child.  Now I know that store bought Nutella is very unhealthy.  So I have created my own Healthy Homemade Nutella.  I have used it in many dishes on this blog.  Now it is time for a Raspberry Nutella Tart.

Nutella Tart 2 watermark

We all need to enjoy a tart every once and a while.  I love them and they are perfect for summer.  There is no cooking involved!  These are completely raw.  They are also vegan, grain free and gluten free!  If you feel compelled to cook the crust, you can.  You just don’t need to.  These are very easy to make even though they look kind of fancy.

Raspberry Nutella Tarts

Raspberry Nutella Tarts

Prep Time 30 min Serves 5 tarts     adjust servings

Ingredients

    For the crust

    For the filling

    For the fruit

    • 2 cups fresh raspberries or strawberries

    Instructions

      For the crust

      1. In a food processor , grind up the almonds until they are a course consistency.
      2. Once they are ground, add in the dates and water until the dough comes together. If you are not using a high powered food processor , you might want to soak the dates for 5 minutes in water to soften them.
      3. Grease your tart pan or mini tart pan s and then press the dough into the pan and up the sides. The dough will be sticky and I find that working with wet hands helps.
      4. Once the dough is set into all the tarts, place them in the fridge to firm up. About 30 minutes.

      For the filling

      1. While the tarts are setting up, you can make the filling. In the food processor , grind up the hazelnuts into as fine of a powder you can get them.
      2. Once they are ground, add in the remaining ingredients. If the mixture seems too thick, you can always add a bit more milk.
      3. Once the crusts are set, spoon the filling into each one and top with the fruit.
      4. Enjoy!

      by

      Healthy Key Lime Tarts (Vegan and Paleo)

      Healthy Key Lime Tarts.  One of the things I think of during summer is healthy key lime tarts.  I knew I had to find a way to make a healthy key lime vegan tart recipe.

      My father-in-law loves all things key lime and he loved this key lime tart recipe!  I had him come over and taste test them.  If you like my Key Lime Larabars, you will love these key lime tarts!


      Healthy Key Lime Tarts


      I had soaked some cashews because I was making some Smoky Sweet Potato Tacos and the recipe called for a maple cream.

      I thought they were plenty sweet and didn’t end up making the cream part.  The tacos were bomb though!

      I used the extra cashew cream in this recipe. These little tarts are vegan, grain free, gluten free and raw.  I hope you enjoy them as much as we did.

      Healthy Key Lime Tarts

      Healthy Key Lime Tarts

      Prep Time 2 hr Serves 5 - 6 servings     adjust servings

      Ingredients

        For the crust

        For the filling

        Instructions

          For the crust

          1. Soak the cashews overnight and then drain and rinse.
          2. In the food processor , grind up the salt, almonds and pecans until they are a course/crumbly texture.
          3. Add the dates and pulse until a dough starts to form. You may need to add a couple tablespoons of water or oil if the dough is not holding well.
          4. Press the dough into individual greased tart pans . I have the kind with the removable bottoms. Makes it real easy to remove them afterward. I got five out of my batch. It helps to use wet hands while forming the dough into place.
          5. Once all the dough is formed in the cups, place in the fridge for 30 minutes to firm the dough back up.

          For the filling

          1. While the dough is firming back up, you can start on the filling. Throw the cashews, coconut milk, sweetener and lime juice in a blender and blend until smooth. I used my Vitamix . Take a taste. If you like it a little more tart, add some more lime juice.
          2. Pour the contents into the tart shells and let chill in the fridge for a couple hours. That’s it!

          by