Pumpkin Pie Smoothie!

So in mid September we got the girls a pumpkin for Halloween.

I guess we were excited and maybe got it too early, because it rotted into a pile of mush.  So we went out again, the week before Halloween and got another one.  We had intentions of carving it also, but didn’t get a chance.  So last night we decided to roast that sucker.

It took all night because we had to do it in pieces.  We are now swimming in fresh pumpkin puree!  I stuck half in the freezer, but used some of it to make some smoothies.  They were delicious!

pumpkin pie smoothie 1 watermark

Pumpkin Pie Smoothie!

Pumpkin Pie Smoothie!

Prep Time 3 hr

Ingredients

Instructions

  1. Mix all the ingredients, except for the milk, together in a small bowl. 
  2. Put the mixture into an ice cube freezer tray and let  freeze for a few hours. 
  3. Take the frozen cubes out and throw them in a blender with the 1/2 cup milk. I used a Vitamix. 
  4. Mix until smooth.

by

Recipe Notes

You could even do a triple batch so you can enjoy them whenever you have a pumpkin craving. Enjoy!

Healthy Gingerbread Cookies

Thanksgiving is almost here, and now is the perfect time to start rolling out the gingerbread recipes!  Here’s a healthier version of an old favorite, the gingerbread cookie.  The gingerbread cookie is a great recipe to do with your kids.  My daughter, Meadow, helped me make and cut these gingerbread cookies out.  She also dumped flour all over my kitchen counter and spooned handfuls of dough in her mouth when she thought I wasn’t looking.  Gotta love kids.

I have an exciting update to this post for you!  Not only am I sharing a healthy gingerbread cookie recipe, but MightyNest is giving away over $100+ of healthy baking products perfect for your holiday baking!!

MightyNest for schools supports the school of your choice.  If you sign your school up, every time you shop on Mighty Nest, they will donate 15% of the sales to your school.  So you get safe, eco-friendly, reusable products for your kids and home, and you earn money for your school.  Can it get better than that?  Mighty Nest also supports healthy eating and living by sharing tips and challenges.  One lucky reader will win $100+ in healthy cookie baking products!  To enter the giveaway, please scroll down to the bottom of this post.

MightyNest


Gingerbread Cookies - My Whole Food Life

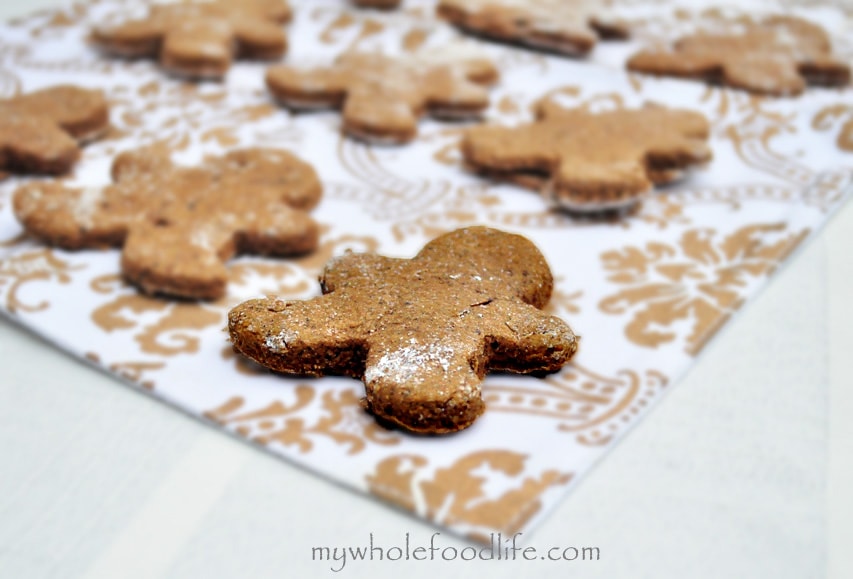
Most gingerbread cookies I have made in the past end up hard as rocks.  I love that these cookies are a bit on the softer side.  Probably due to the applesauce I put in them.  These cookies have very little fat and contain no processed sugar so feel free to have a few!

Healthy Gingerbread Cookies

Healthy Gingerbread Cookies

Prep Time 2 hr Cook Time 8 min Serves 18 Cookies     adjust servings

Ingredients

Instructions

  1. Mix the dry ingredients in one bowl.
  2. Mix wet in another.
  3. Add dry to wet and mix only until combined.
  4. Remove the dough from the bowl and cut into two equal parts.
  5. Wrap the dough in plastic and refrigerate for at least 2 hours.
  6. Preheat oven to 350.
  7. After two hours, remove the dough from the fridge.
  8. Roll the dough onto a floured surface until it is about 1/4 inch thick. Please use additional flour if necessary.
  9. Cut dough into desired shapes and place them onto a lined baking sheet.
  10. Bake the cookies for about 8 minutes and then let them cool a bit before removing.
  11. Set them aside to completely cool before decorating. Enjoy!

by

When you purchase through MightyNest, you get to support the school of your choice.  Bet you can’t wait to get baking!  Take the pledge to consider using healthier baking products and sign your school up today!  Good luck in the giveaway!


Pumpkin Granola Bars (Vegan and Gluten Free)

Pumpkin Granola Bars.  Granola bars are so great.  I just love these vegan granola bars.   Not only are they healthy and easy to make, but they travel well and make good snacks when you are on the go.

But let’s face it, the store bought granola bars can not be trusted to be healthy.  Making your own is great because you can control the ingredient and sugar.

After my post for the peanut butter granola bars, there were requests for other flavors.  So naturally I had to try pumpkin granola bar recipe.


Pumpkin Granola Bars


This recipe is very similar to my pumpkin granola.  These bars are a bit on the soft side because of the pumpkin, but they taste delicious!  They only took minutes to make.

You can make a big batch and freeze some too.  That works great if you get a pumpkin craving in the spring like I sometimes do. 🙂


Pumpkin Granola Bars


Want to make this recipe?  Watch the video below! For more videos, you can subscribe to my You Tube Channel.


Looking for more pumpkin recipes?

Pumpkin Granola Bars

Pumpkin Granola Bars

Prep Time 10 min Cook Time 25 min

Ingredients

Instructions

  1. Preheat oven to 350. 
  2. Mix all the dry ingredients together in one bowl. 
  3. Mix wet into another. 
  4. Combine wet to dry really well so all the oats get coated. 
  5. Line a baking pan with parchment paper.  I used an odd sized pan, but an 8X8 or 9X9 pan would work well.  Give yourself enough of the paper so it sticks out the sides.  This will make the bars easier to pull out and cut with a pizza cutter. 
  6. Using the extra paper, press the bars with your palms so they are packed well and evenly flat.
  7. Bake in the oven for about 20-25 minutes.  Let the bars cool completely before cutting.

by

Recipe Notes

Store in an airtight container separated by parchment paper. They should keep for about two weeks. Enjoy!

Pumpkin Granola Bars

Gingerbread Granola (Vegan and Gluten Free)

Gingerbread Granola.  I know that Thanksgiving has not officially happened yet, but let’s move on to some Christmas food!  One of the first flavors I think of is gingerbread.  I bring you, Gingerbread Granola.


gingerbread granola


The stores don’t waste any time pushing the holidays out.  I think that I saw the Christmas decorations coming out at Target the day after Halloween.

This granola is so good.  Even as I type, I am munching it. 🙂 This dish would be a great thing to serve on Christmas morning.

My whole house smells like a Yankee Candle now, bringing back memories.  It’s funny how just a smell or a song can transplant you back in time.

What foods remind you of Christmas?

Looking for more granola recipes?

Gingerbread Granola

Gingerbread Granola!

Prep Time 10 min Cook Time 30 min

Ingredients

Instructions

  1. Preheat oven to 350.
  2. In a large bowl , combine all the dry ingredients. 
  3. In a medium bowl , combine wet ingredients. 
  4. Add wet to dry making sure all the dry ingredients are evenly coated. 
  5. Place onto lined baking sheet and cook in the oven for about 30 minutes, stopping to shake the pans halfway through.  Enjoy!

by

Slow Roasted Pear Crumble

This slow roasted pear crumble is simply amazing. I did not set out to make a pear crumble recipe at first. I am not even a huge fan of pears, but my husband and my daughter Meadow love them.  I do love a good fruit crumble recipe though. Since we ended up getting a bag of pears in our co op basket this past weekend, I decided to slow cook them in the crock pot to see how they would turn out. The smell in the house that day was amazing.  A Yankee Candle had nothing on these babies.  The pears came out so delicious in fact that even I had some.  I decided to boost them into even more awesomeness with the addition of a crumb topping.

Slow Roasted Pear Crumble - My Whole Food Life

It worked.  Marcus said they were the best part of his lunch this week.  This dish would be a perfect addition to your Thanksgiving meal.  I’m making it this holiday season for sure.

Slow Roasted Pear Crumble

Slow Roasted Pear Crumble

Slow Roasted Pear Crumble

Prep Time 20 min Cook Time 4 hr

Ingredients

    For the pears

    For the crumb topping

    Instructions

      For the pears

      1. Throw all the ingredients in the crock pot and cook on high for the first hour and then turn to back to low for at least 3-4 hours. This only gets better the longer you cook it.
      2. For the next step, you can place the pears in an 8X8 glass baking dish .
      3. Take some of the liquid from the crock pot and add it to the pears.

      For the crumb topping

      1. Preheat oven to 350.
      2. In a food processor , combine all the ingredients and pulse until the oats are sticking together.
      3. Sprinkle the mixture on top of the pears.
      4. Bake in the oven for about 30 minutes. Enjoy!

      by


      Peanut Butter Granola Bars (Vegan)

      Peanut Butter Granola Bars are very easy to make yourself. This recipe can be used as a base and you can add in whatever you like.  If you need a nut free version, sunflower butter works great in place of the peanut butter.


      peanut butter granola bars


      These bars are very similar to my Peanut Butter Banana Breakfast Cookies.  They came out yummy and were kid friendly too.  My little girl loved them!


      It is all over Meadow’s face.  Even my mostly tube fed baby ate some!


      This would make a good afternoon snack too.  I often snack on my homemade granola in the afternoons for a sweet treat.  You can find one of those recipes here.

      Peanut Butter Granola Bars

      Peanut Butter Granola Bars

      Prep Time 10 min Cook Time 30 min

      Ingredients

      Instructions

      1. Preheat oven to 350. 
      2. Mix all dry ingredients in one bowl. 
      3. In a sauce pan, on medium heat, combine the banana, peanut butter, maple syrup and milk. 
      4. Stir until combined. 
      5. Add peanut butter mixture to the dry ingredients and mix well. 
      6. Fold in the chocolate chips
      7. Line a pan with parchment paper. I do this because it is so easy to just lift them out of the pan and cut with a pizza cutter.  I do, however, reuse the same piece of parchment over and over again.  There is no reason to throw it away after one use.  I just store it in the cabinet with the baking pans.
      8. Bake them in the oven for about 20-25 minutes. 
      9. Let them cool completely before cutting.

      by

      Recipe Notes

      I store them in a plastic container separated by parchment paper. They should keep for about two weeks, although mine will not last that long! Enjoy!

      What other flavors would you like to see?