
When Melissa and I began MyWholeFoodLife, it was meant to be an outlet for our passion of healthy living and all things healthy food. While the thought of the blog growing into a business never entered our mind, just a few years later here we are. It’s great because Melissa can work from home on her own schedule, and still be around for the girls. If you want to have the same kind of creative outlet for your passion, whether it be food or something else, I highly recommend you follow that calling. Don’t where to start? I’ll show you just how easy it is to be up and running over at BlueHost.
Get Hosted
Click this BlueHost link and get started by clicking the large bright green button that says get started now. The next thing you will see is this:
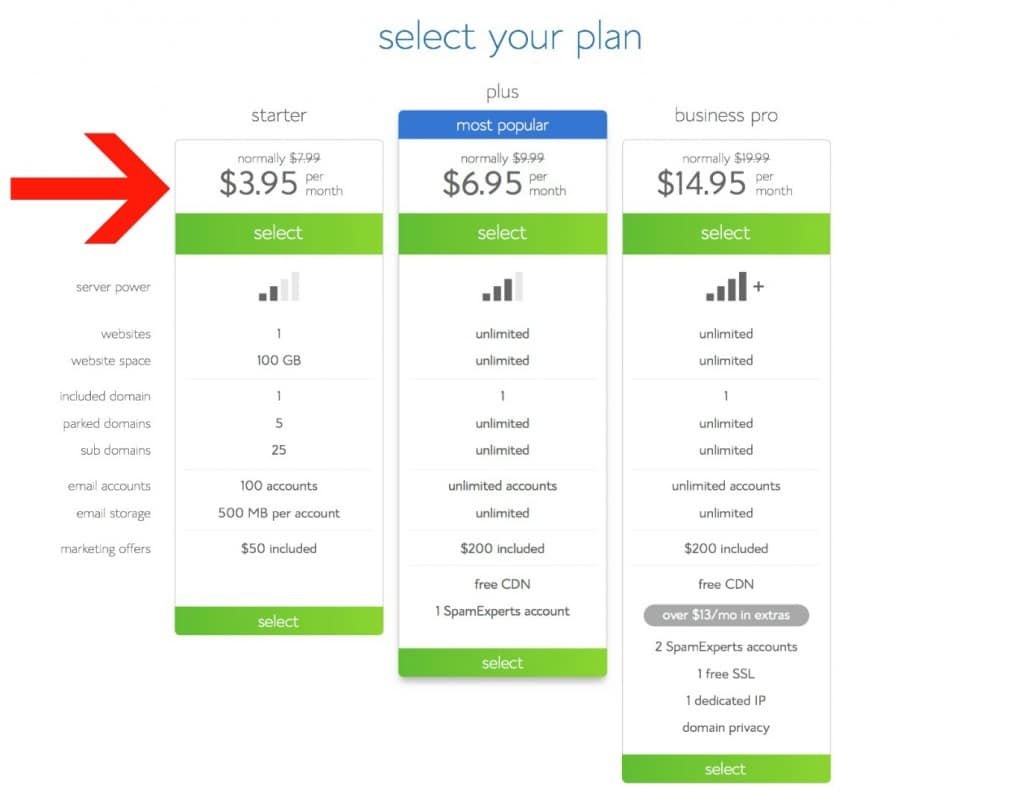 The first screen you’ll see lets you choose your plan. While the middle plan might offer more, there is no reason to start off with more than you need. You can always upgrade later through BlueHost if you need. I’d suggest to choose the starter plan on the left by clicking it’s green select button.
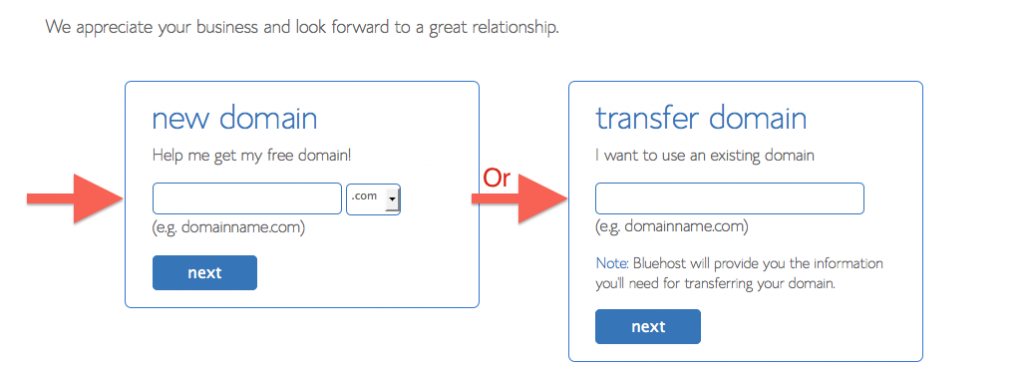 The first thing you have to do is pick a website name, known as a domain name. It’ll be the thing people type in the address bar of a browser to get to your blog. Make it catchy; something memorable to others. Got it? Great!!! Now enter it into the text box on the left and click the next button.
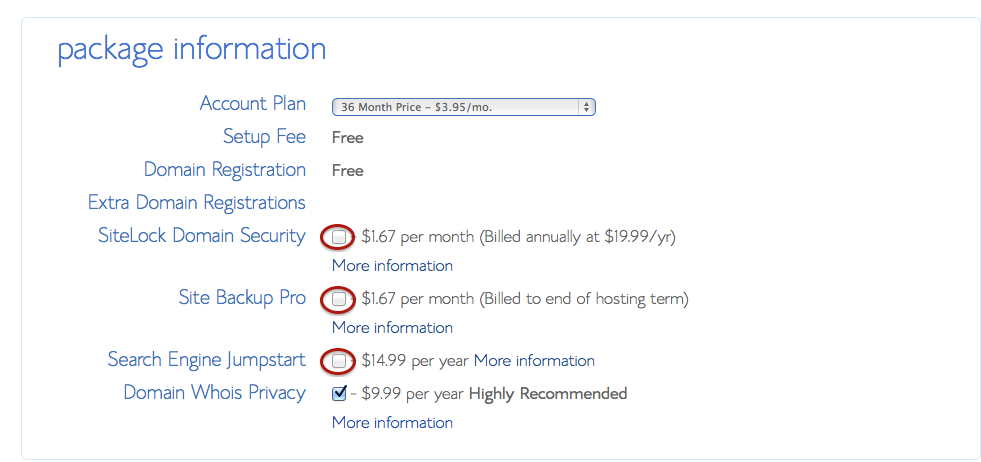
Fill out all the information on the next page including your Billing and Contact information. I would like to call out this snippet though. The only thing I would suggest doing here at the get-go is the Domain Whois Privacy. When someone owns a domain name, the information of who owns the site can be made public. This includes their address and phone number. Eek!!! As an individual, you don’t want that hassle, so pay the extra $9.99 a year and keep your privacy.
Setting Up WordPress
Now your site has a home in the broadest of senses. You still have to set up your site to look and feel the way you want it. That’s where WordPress comes into play. It’s the most widely used tool in the world to create and manage content for a website and getting started is as easy as a few clicks.
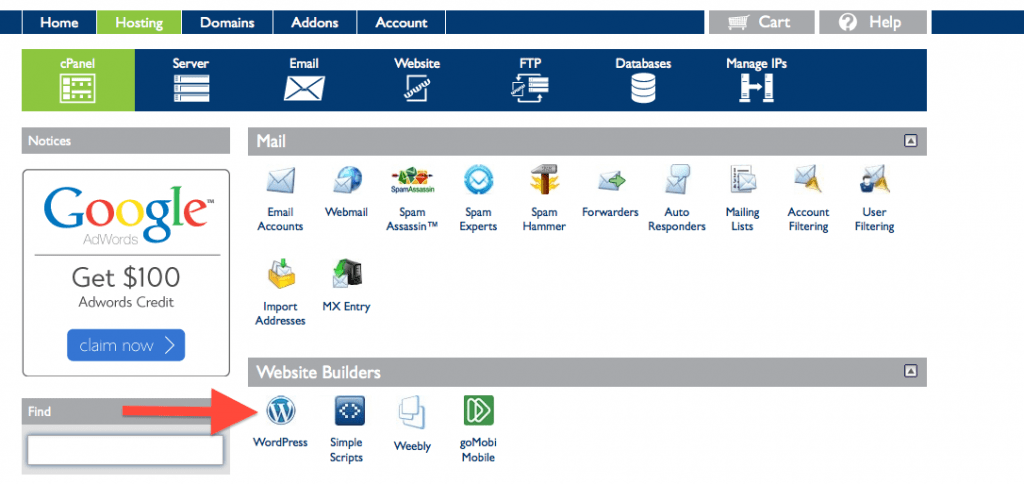 This screen is like central command for when you log into your BlueHost account. From here, to install WordPress, click the WordPress icon under Website Builders.
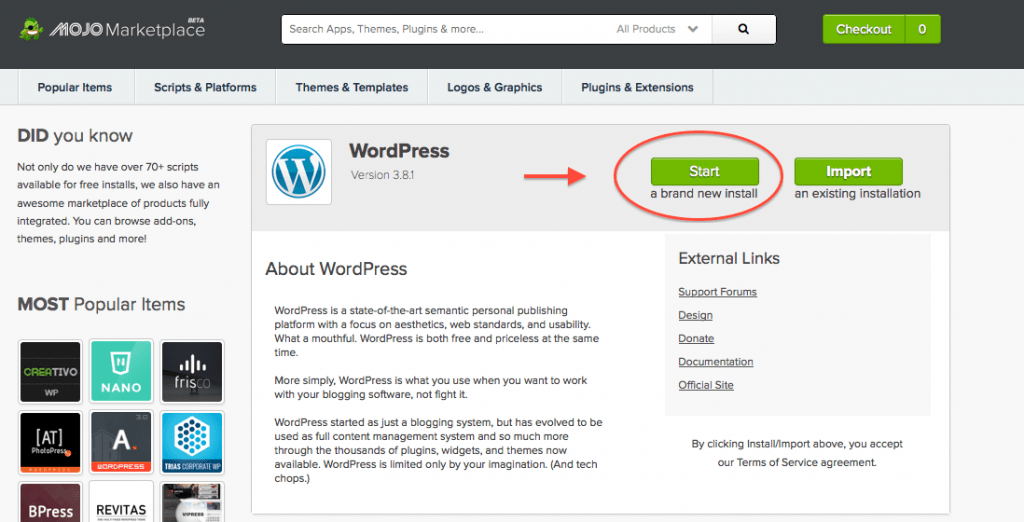 To start installing WordPress, click the green Start button. So far, pretty simple. Right? Let’s move on to the next step.
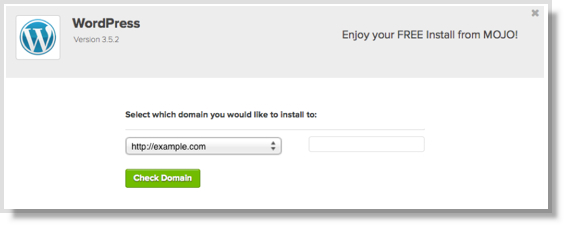 Now choose the domain you want WordPress installed. If this is the only domain name you have, then the choice is clear.
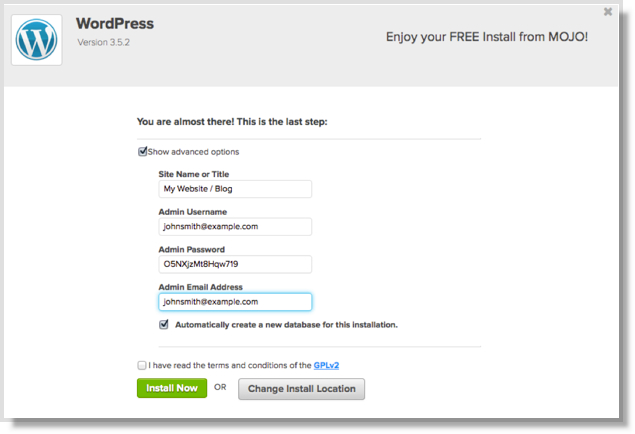 This screen might look pretty daunting if you aren’t the techie type like me. So your site name , or title, is what you want your site to be called. So for us, when we set up WordPress, we typed in MyWholeFoodLife. This doesn’t have to match your web address you chose, but I can’t think why you wouldn’t want it to. The only other things I think needs explaining are the checkboxes. The first checkbox needs to be checked as WordPress uses this database your website content in. The next is a simple license agreement. GPLv2 is a standard open-source license. You are not being asked to sign your life away.
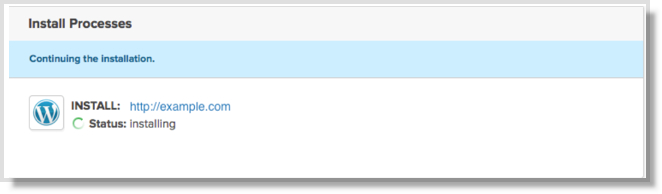 This is basically the last screen you are presented with and is nothing more than a status screen. Once this is done, WordPress will be installed and you will be ready to move to the final (and most fun) step.
Making It Your Own
The nice thing about WordPress is a vast majority of websites on the web run off WordPress. Sites like WPBeginner are great places to learn how to get started. The first thing you want to do is go to your web address and notice that WordPress responds with a page. Follow the workflow WordPress presents you with, and then log in. Once you are logged in, you will notice that you have a whole bunch of options. I would suggest by picking a theme you like and getting that set up first. None of it is difficult, and all can be found by searching YouTube and Google. This is where the training wheels are coming off. Start looking on the web and see what you can do to personalize your new blog. Enjoy!!!
Disclosure: This post contains affiliate links but opinions are my own. The end.
8 thoughts to “Have A Food Blog in 3 Easy Steps”