Roasted Pesto Portobellos

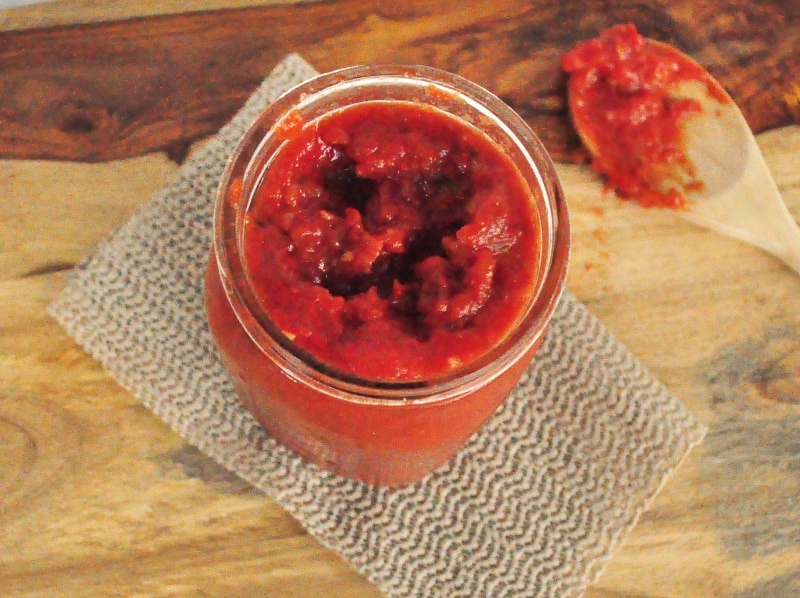
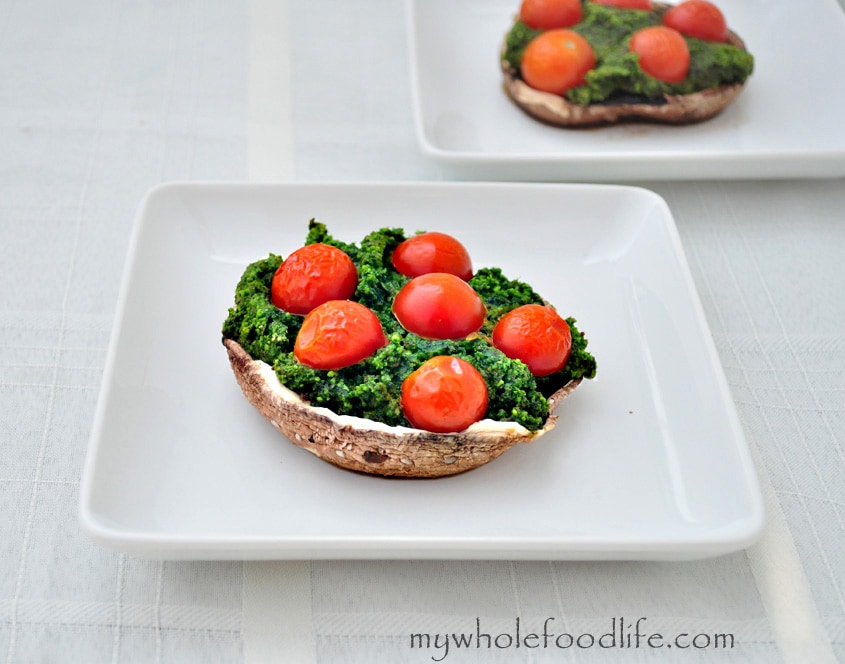
If you were to ask me what some of my favorite veggies are, spinach, mushrooms and cherry tomatoes top the list.  So, I thought I would combine them together to make this super easy meal.  This meal is so easy to put together.  I made the whole thing within just a few minutes after we got home from my daughter’s soccer game.

Musroom Portobello watermark2

This meal comes together in minutes.  It really is no trouble at all.  For the pesto, I used almonds instead of pine nuts because pine nuts can be so expensive.  The almonds worked out great.  I also use nutritional yeast in place of cheese.  Nutritional yeast is super healthy and actually is a great source of B12.  B12 is one of the few vitamins that is hard to find in a plant based diet.  It also has a cheesy and nutty flavor and that is why it’s used in place of cheese.  This was the first meal I made using some ingredients from our garden.  The basil is flourishing so I plucked a whole bunch off.  It grows back so fast.

Roasted Pesto Portobellos

Roasted Pesto Portobellos

Prep Time 10 min Cook Time 20 min

Ingredients

  • 1 cup almonds
  • 10 basil leaves
  • 1 cup baby spinach
  • 2 T nutritional yeast
  • 3 cloves of garlic
  • 1 T parsley
  • 1/4 cup olive oil
  • 1/2 tsp salt
  • 8 cherry tomatoes halved
  • 3 portobello mushrooms stems removed

Instructions

  1. Preheat oven to 400.
  2. In a food processor grind up all the ingredients except the mushrooms and tomatoes until a pesto forms.
  3. If the mixture seems a bit dry, you can add a bit more oil or even a little water.
  4. Grease a baking sheet and lay the mushrooms on it.
  5. Fill each cup with pesto and top with the cherry tomatoes.
  6. Put in the oven for about 20 minutes.

by

Recipe Notes

We were actually going to make 4 mushrooms, but my husband butchered one in the process of removing the stems. That is why in the picture, the caps are filled to the brim with pesto. They were still delicious, and I wish we had leftovers, but they were all gone quickly. I hope you enjoy them as much as we did!

Easy Crock Pot Tomato Sauce

Easy Crock Pot Tomato Sauce.  Tomato Sauce is a lot like ketchup and BBQ Sauce, in the fact that you can’t seem to find a store bought kind that doesn’t contain processed sugar.

So, I set out to create a super easy, crock pot tomato sauce that tastes great with no added sugar.  When we got our co-op basket this past week, I saw a package of tomatoes on the vine and I knew I was going to use them for sauce.

This crock pot tomato sauce recipe is almost as easy as my Homemade Vegetable Stock.


Easy Crock Pot Tomato Sauce

This sauce is so easy that you really just throw everything in the crock pot and walk away.  Plus, it makes a ton.  We freeze it for those busy days when you need to make dinner in a hurry.

You can pull it out in the morning and let it defrost on your counter top all day.

Easy Crock Pot Tomato Sauce

Easy Crock Pot Tomato Sauce

Prep Time 3 hr

Ingredients

  • 12 vine ripened tomatoes peeled and chopped
  • 1/2 onion rough chopped
  • 1/4 cup fresh flat leaf parsley chopped
  • 10 basil leaves
  • 2-3 garlic cloves minced
  • 1/2 tsp thyme
  • 1 tsp oregano
  • salt and pepper to taste

Instructions

  1. Throw everything in the crock pot and cook on high for at least 3 hours.

by

Recipe Notes

I like to cook it longer because the longer it cooks, the more developed the flavor gets. If the sauce seems thin to you, you can thicken it with a tablespoon of arrowroot. You can also uncover and let it reduce while cooking. This sauce would also make a great sauce for my Rustic Vegan Pizza . If you like a super smooth sauce, feel free to blend it with an immersion blender.

Dairy Free Ranch Dressing Recipe

Dairy Free Ranch Dressing you guys!! I have never met a soul that didn’t like ranch dressing. When we went vegan, my husband really missed ranch.

We wanted to make a dairy-free ranch dressing that would really curb his craving.  This dairy-free ranch recipe really hits the spot.

I don’t know about you, but it seems as though a lot of people have dairy sensitivity lately.  My husband and I are lactose intolerant and my younger daughter is allergic to dairy and soy.

Most of the non-dairy recipes I have seen online use tofu or veganaise as a base.  I was looking for a way to make a soy free ranch dressing recipe and it totally worked!  This is just as easy as the Homemade Peanut Butter and the Healthy Honey Mustard!


dairy free ranch dressing

This yummy dressing passed the ultimate kid test.  My 4 year old loved it!  So, now those of you with kiddos that are dairy sensitive can enjoy the taste of ranch.

I was actually amazed at how well this turned out.  I had my doubts in the beginning.  So here is the recipe.

If you like this, you may also want to check out my dairy free sour cream and my dairy free pesto sauce.

Dairy Free Ranch Dressing

Dairy Free Ranch Dressing

Prep Time 10 min Serves 1.25 cups     adjust servings

Ingredients

  • 1 cup cashews (I used raw and unsalted)
  • 1/4 cup almond milk (If you like a super thick dressing, just omit the milk)
  • 1 clove garlic minced (I do this using a microplane )
  • 3 T chives finely chopped
  • 3 T parsley finely chopped
  • 3 tsp white wine vinegar
  • salt to taste

Instructions

  1. Place the cashews in water and soak overnight in the fridge.
  2. Drain and rinse the cashews and throw them in the blender with just enough water to cover.
  3. Blend them for about 1-2 minutes.
  4. Now add the rest of the ingredients and blend on low for another minute.

by

Recipe Notes

That’s it! This made about 1 1/4 cups and should keep for a few weeks in the fridge. I store mine in recycled glass jars.

High Protein Energy Bites (Vegan)

High Protein Energy Bites that are vegan, gluten free and grain free.  If you have ever made your own nut milk, you know that you are left with a pulp after that almonds have been milked.

I am always looking for ways to use it up.  I came up with some Grain Free Energy Bites in the past.  Here is another high protein energy bite that is also grain free.


High Protein Energy Bites


If you are looking to get more chia seeds in your diet, this would be one way to do it.  These little bites are low in sugar and packed with good protein and also fiber.

They should keep you full for a while.  These would be good before or after a workout.

Looking for more energy bite recipes?

High Protein Energy Bites

High Protein Energy Bites

Prep Time 10 min Serves 10 balls     adjust servings

Ingredients

Instructions

  1. In a food processor, mix everything together until a dough starts to form. 
  2. Roll into balls carefully.  The dough doesn’t hold together very well when rolling but will firm back up in the fridge. 
  3. Chill in the fridge for about 1 hour to get them nice and firm.

by

Recipe Notes

I got about 10 balls in my batch. They should last a couple weeks in the fridge.

Black Beans and Rice

My husband has always been the cook in the family.  I have always loved to bake.  Since he has been moving up in his career, I have had to take on the role of cooking.  However, on the weekends, he does like to cook and this black beans and rice recipe is one of his.  Another one of his recipes is my Peanut Noodle Stir Fry.  That is his favorite.

beans 1

He says he has been making this since college.  Back then he was a meat eater and he used to add a chicken breast in this as well.  So if you are an omnivore, feel free to do just that.

Black Beans and Rice

Black Beans and Rice

Prep Time 30 min Cook Time 30 min

Ingredients

  • 3 cups black beans (We used dried that we soaked overnight and boiled in the morning until they got soft.)
  • 3/4 cup tomato sauce
  • 1/2 yellow onion chopped
  • 1 yellow pepper chopped
  • 10 cherry tomatoes halved
  • 1 cup corn (We used frozen organic corn)
  • 1 small jalapeno seeds removed and diced
  • 2 cups water
  • 1/4 tsp garlic
  • 4 T oil (We used avocado oil)
  • Juice from 2 limes
  • 1 cup wild or brown rice + 2 cups water

Instructions

  1. In a small pot, add the rice and 2 cups water.
  2. Bring to a boil, then turn down, cover and simmer until all the water has been absorbed. About 20-30 minutes.
  3. In a large pan, combine the rest of the ingredients and bring to a boil, turn down and simmer until all the liquid has been absorbed. About 20-30 minutes.
  4. You can add the rice into the pan, or keep them separate like we do. That’s it. Enjoy!

by

Cookie Dough Ice Cream

Let’s face it.  We all want to indulge from time to time.  I mean, who doesn’t like ice cream, especially cookie dough ice cream?  Problem is, most store bought brands are laden with chemicals and processed sugars.  Even the organic ones.  It’s hard to find one that doesn’t contain carrageenan, which is a possible carcinogen.  So I created this little treat for you.

ice cream 1

It was 80 degrees today in Texas and I broke out my ice cream maker for the first time in months.  If you don’t have an ice cream maker, I highly suggest getting one.  It is so much cheaper to make your own ice cream.  This recipe couldn’t be easier.  It’s dairy free, soy free, can be made gluten free and free of refined sugars.  For the cookie dough part, I used my No Bake Cookie Dough Bites and rolled them into tiny balls.  You will have some extra left over, but I promise they are delicious!

Cookie Dough Ice Cream

Cookie Dough Ice Cream

Cookie Dough Ice Cream

Prep Time 20 min

Ingredients

Instructions

  1. Make sure you have had the ice cream bowl frozen for at least 18 hours. It has to be good and cold. I made the cookie dough ahead of time and had it chilling in the fridge.
  2. Pour all the ingredients except the cookie dough into the ice cream machine .
  3. Turn the machine on. It will take about 15 minutes.
  4. When the mixture starts to look like it is coming together and almost done, add in the cookie dough.
  5. Stop as soon as it looks like soft serve ice cream.
  6. If you wish for a harder ice cream, you can put the ice cream in a bowl and stick it in the freezer for about 15 minutes. That’s it!

by