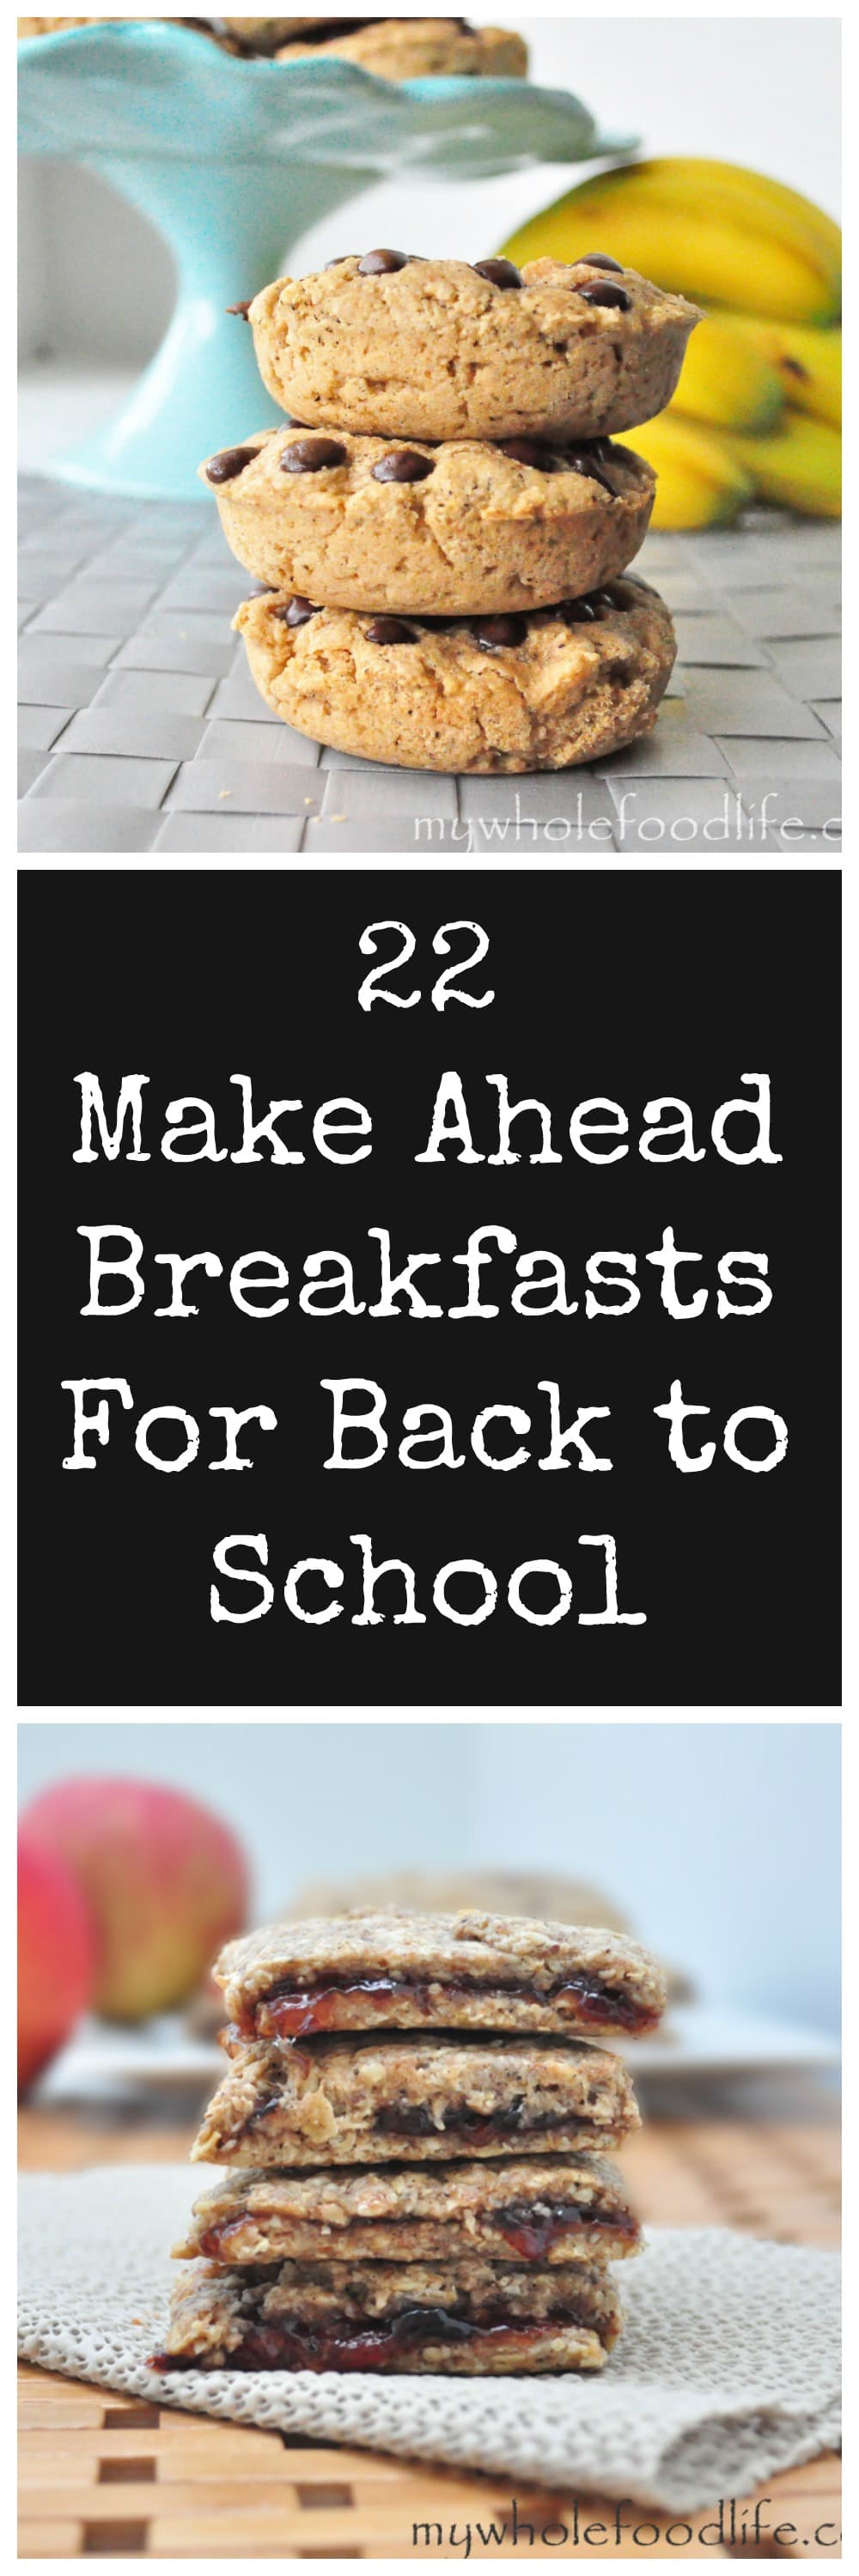
It’s that time of year again. The kids are going back to school. Mine start in a couple of weeks. So now is the time to get organized so you are not rushing on those busy mornings. Here is a list of make ahead breakfasts you can freeze and easily pull out in a hurry. I thought I would also share some of my favorite school lunch supplies.
Lunchbots Lunchboxes – We have had these going on 3 years and they are great.
Kids Drinking Thermos – Another product we have had 3 years so far. They are very easy to pop open. Perfect for little hands.
Lunchskins Re-Usable Snack Bags -These are easy to clean and quick drying.
Hot Food Jars – Perfect for bringing hot foods like pasta and oatmeal.
Kids Konserve Ice Packs – Made of non toxic materials and BPA free.
Olive Kids Lunchbox – Durable, BPA free and easy to clean. Comes in many styles.
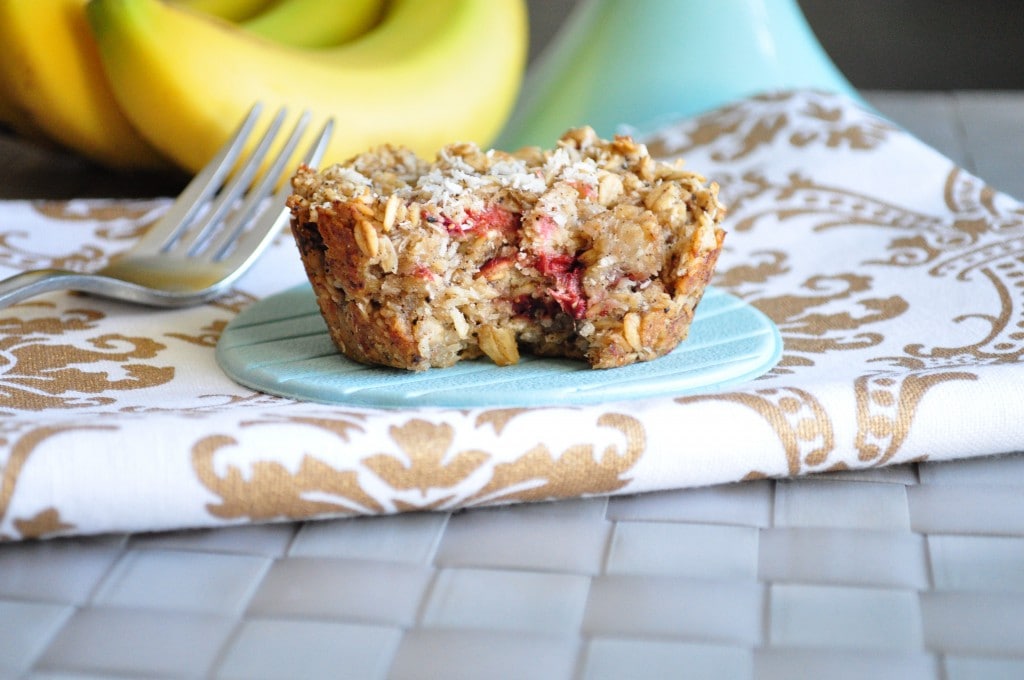
Strawberry Banana Baked Oatmeal
This recipe will make a weeks worth of healthy breakfasts you can freeze and reheat for busy mornings. You can swap out the fruits for what you have on hand as well.
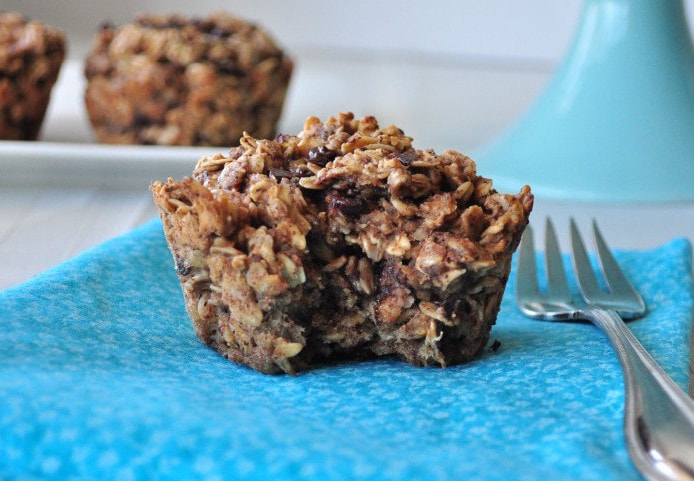
Almond Butter Chocolate Chip Oatmeal
This recipe can also be made with peanut butter or sunflower butter. The choice is yours. Make, freeze and re-heat.
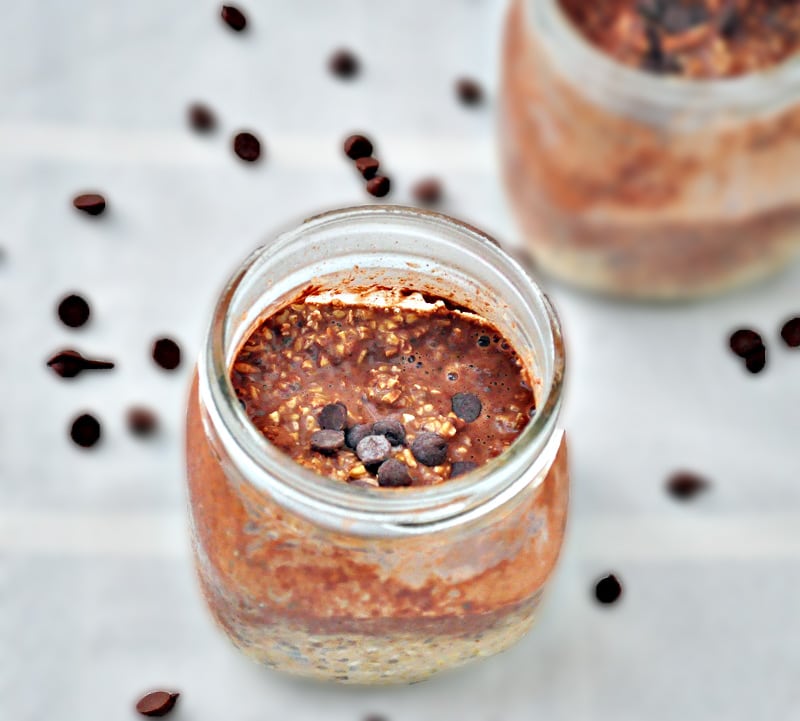
Almond Butter Overnight Oats
Use this recipe as a base and add in your own flavors. Fruits, nuts, seeds…the possibilities are endless! Make a weeks worth of these and then grab them when you need them.

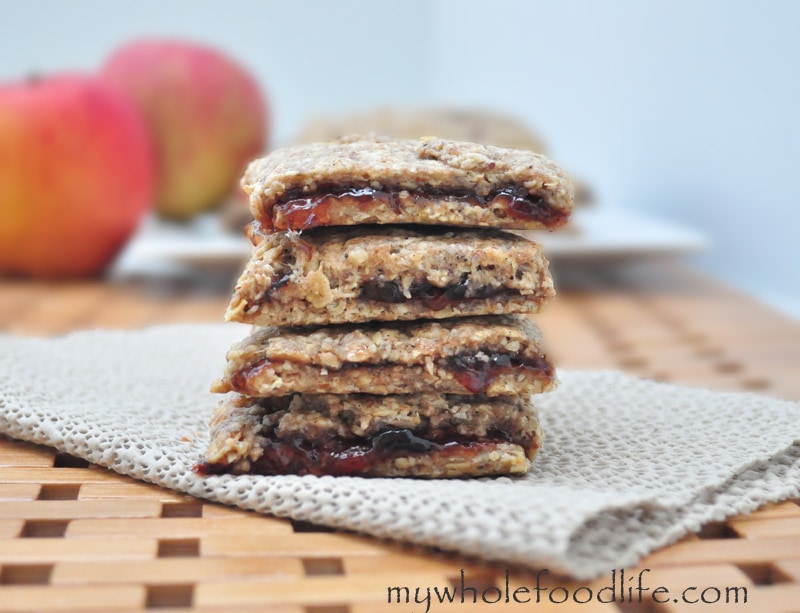
Homemade Pop Tarts
Fill them with your favorite jams. I personally love them with blueberry chia jam. Then just freeze them and pull them out when needed.
Homemade Nutri-Grain Bars
These are perfect to throw in your child’s lunch box. My kids love them. Add in your favorite jam and you are ready to go. They freeze very well.
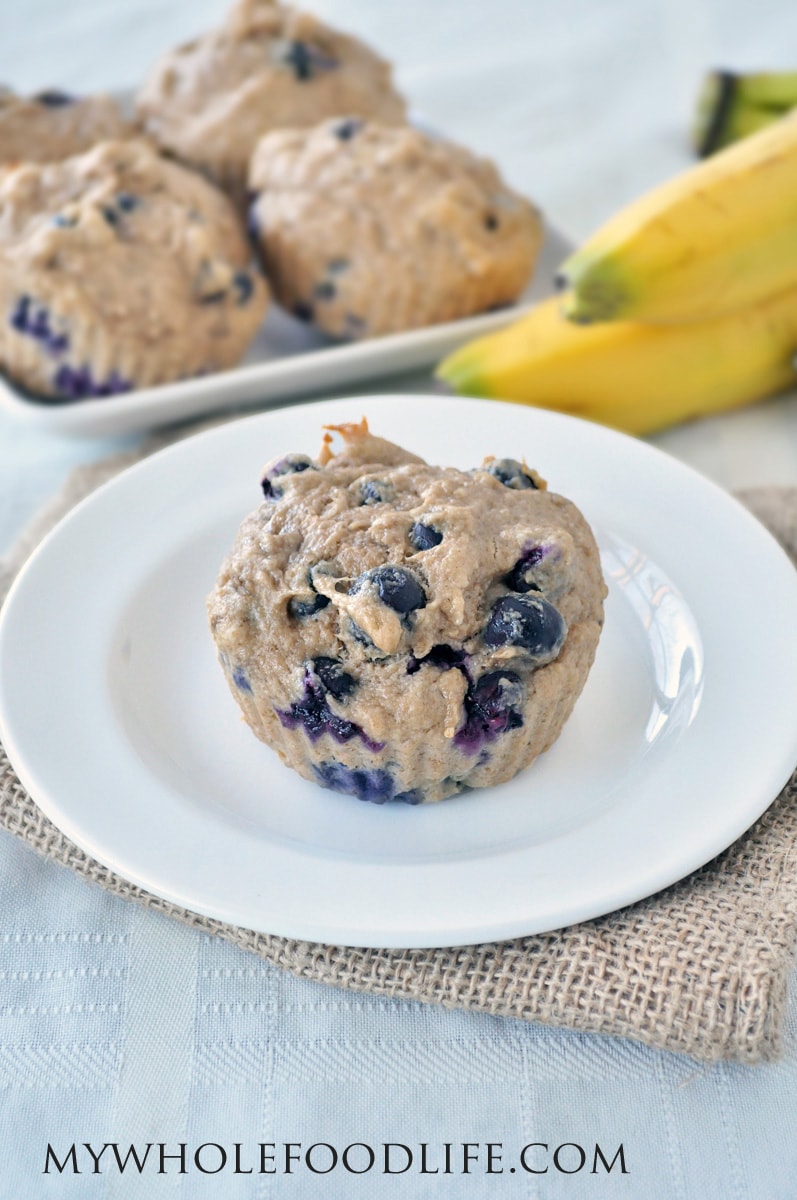
Banana Blueberry Muffins
These freeze very well and all the kids love them. They can also be done gluten free.
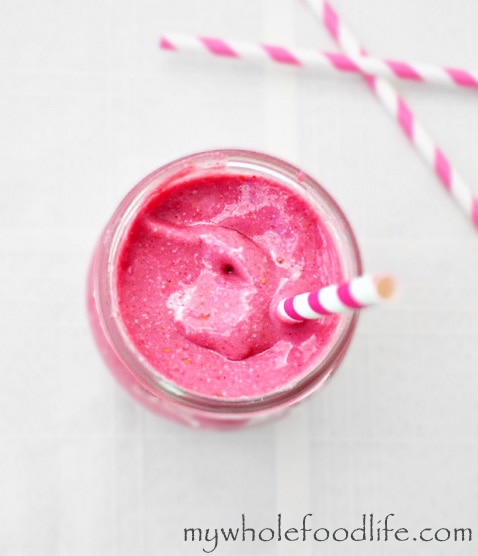
Raspberry Coconut Smoothie
Make a big batch of these and then freeze them in ice cube trays. Then on those busy mornings, just pop out and blend what you need.
Here are some other recipes from some blogs I follow.
Real Food. Real Deals No Knead Apple Pie Bread
Eat Good 4 Life Chocolate and Peanut Butter Chia Pudding
The Clever Carrot Gluten Free Zucchini Muffins
Sugar Dish Me Whole Wheat Poppy Seed Bagels
Chocolate Covered Katie Gluten Free Cinnamon Sugar Waffles