Clean Eating Peanut Butter Cups (Vegan)

Clean Eating Peanut Butter Cups.  Let’s face it.  We all need a little something sweet every once and a while.  Who says you need to give up peanut butter cups?  While I will never eat Reese’s Peanut Butter Cups again, I will have a homemade peanut butter cup every now and then!


clean eating peanut butter cups


I made these with homemade peanut butter and also almond butter.  Both worked out well, but I think I liked the peanut butter cups better.  Most homemade peanut butter cup recipes call for powdered sugar.  This does not.  I just dropped some freshly made peanut butter in the middle of these.

So much better that way and also much less sugar too!  The chips I used are from Enjoy Life.  You can also make your own chocolate with 1 cup coconut oil, 1/2 cup cacao powder and a few tablespoons of liquid sweetener.  Or you could melt a couple of bars of dark chocolate with a bit of milk.  Any way works.

The Enjoy Life chips have a pretty clean ingredient list and are gluten free as well.  They do contain a bit of processed sugar which is why I gave some other options.  I have tried the chips and the coconut oil chocolate.

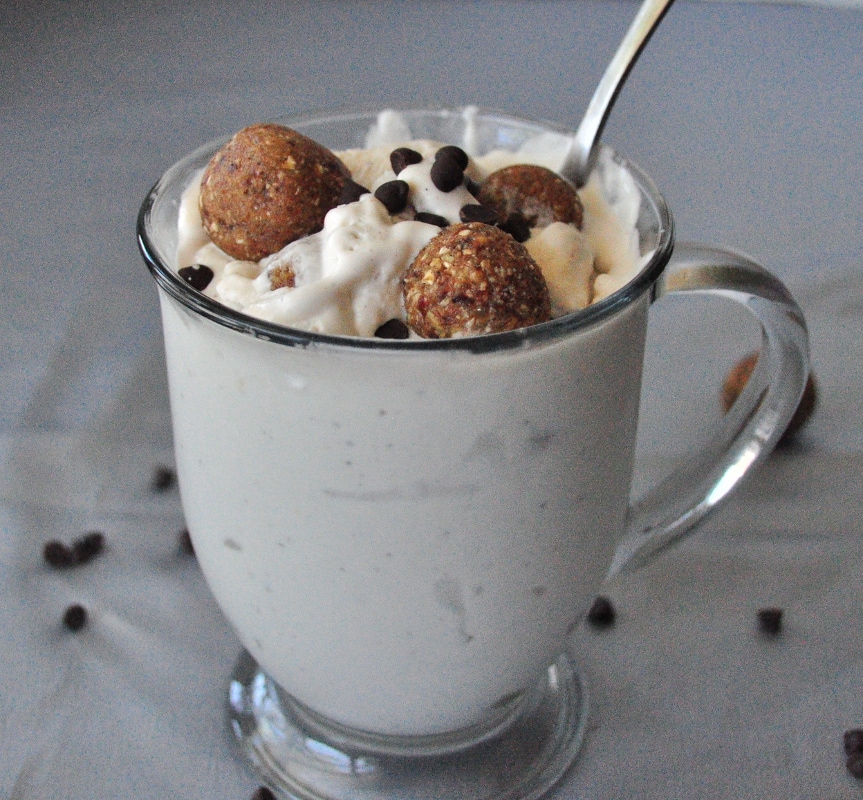
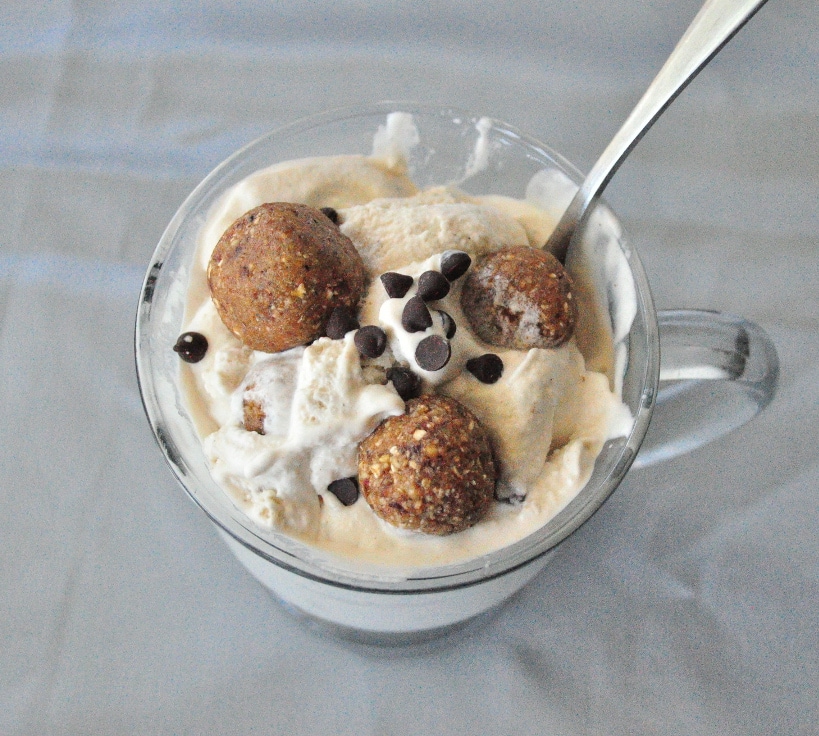
I chopped one of these homemade peanut butter cups and ate it in my 5 Minute Banana Ice Cream.  OMG!  Best.Thing.Ever.  A healthier dessert option.

If you don’t want to use chocolate chips, you can use my 3 ingredient chocolate recipe in this video.

Looking for more candy recipes?


Clean Eating Peanut Butter Cups

Clean Eating Peanut Butter Cups

Prep Time 10 min Cook Time 20 min Serves 12     adjust servings

It's a healthier version of a Reece's Cup.

Ingredients

  • 1 bag chocolate chips (I used Enjoy Life gluten free and soy free chips)
  • 3/4 cup almond milk
  • Roughly 3/4 cup peanut butter or almond butter

Instructions

  1. Get out a couple of muffin tins and line them with paper or silicone cups. . I used standard sized muffin pans, but the mini cups would work well too.
  2. Using a double boiler, melt the chips and milk in a glass bowl, stirring constantly to get the lumps out. It makes a great arm workout.
  3. Once the chocolate and milk have combined and are smooth, pour a little bit of chocolate in the bottom of each muffin cup.
  4. Place them in the freezer for about 20 minutes to set.
  5. When they are hard, pull them out and put a dollop on nut butter on top of each one.
  6. Fill the remaining cup with chocolate.
  7. Repeat until all the cups are filled.
  8. Place back in the freezer.

by

Recipe Notes

I would give them a few hours to set. Actually, I store mine in the freezer as well. I think they would get too soft in the fridge. That’s it!

Healthier Chocolate Chip Cookies

I love cookies.  I love chocolate chip cookies. I mean, what’s not to love?  Cookies have always been my go to food for something sweet and chocolate chip cookies have always been one of my faves. It was about time I created a healthier chocolate chip cookie recipe to satisfy my cravings. I already have my Healthy Oatmeal Cookies and my Healthier Peanut Butter Cookies on the blog, so this was a natural fit.

cookies

I think one of the things that makes these taste so good is the ground vanilla bean.  It adds a nice sweetness.  I had my doubts that this recipe would work and was pleasantly surprised when I tasted the batter.  These are so amazingly good! I did use a little more sweetener than I normally do, because I didn’t know how it would turn out.   Next time I may attempt them with less.  I also might try sweetening them with dates.  They are still far healthier than traditional cookies, which usually contain 1 1/2 cups of sugar.

Healthier Chocolate Chip Cookies

Healthier Chocolate Chip Cookies

Prep Time 15 min Cook Time 13 min Serves 18 Cookies     adjust servings

Ingredients

Instructions

  1. Preheat oven to 350.
  2. In a food processor, grind the rolled oat into a fine consistency.
  3. Add them to a bowl with the rest of the dried ingredients.
  4. Mix all the wet ingredients in another bowl.
  5. Add the dry to wet and stir just until everything is combined.
  6. Fold in the chocolate chips. The batter will be on the wet side.
  7. Drop cookies onto a lined baking sheet and bake for 10-13 minutes.

by

Recipe Notes

Enjoy!

Cookie Dough Ice Cream

Let’s face it.  We all want to indulge from time to time.  I mean, who doesn’t like ice cream, especially cookie dough ice cream?  Problem is, most store bought brands are laden with chemicals and processed sugars.  Even the organic ones.  It’s hard to find one that doesn’t contain carrageenan, which is a possible carcinogen.  So I created this little treat for you.

ice cream 1

It was 80 degrees today in Texas and I broke out my ice cream maker for the first time in months.  If you don’t have an ice cream maker, I highly suggest getting one.  It is so much cheaper to make your own ice cream.  This recipe couldn’t be easier.  It’s dairy free, soy free, can be made gluten free and free of refined sugars.  For the cookie dough part, I used my No Bake Cookie Dough Bites and rolled them into tiny balls.  You will have some extra left over, but I promise they are delicious!

Cookie Dough Ice Cream

Cookie Dough Ice Cream

Cookie Dough Ice Cream

Prep Time 20 min

Ingredients

Instructions

  1. Make sure you have had the ice cream bowl frozen for at least 18 hours. It has to be good and cold. I made the cookie dough ahead of time and had it chilling in the fridge.
  2. Pour all the ingredients except the cookie dough into the ice cream machine .
  3. Turn the machine on. It will take about 15 minutes.
  4. When the mixture starts to look like it is coming together and almost done, add in the cookie dough.
  5. Stop as soon as it looks like soft serve ice cream.
  6. If you wish for a harder ice cream, you can put the ice cream in a bowl and stick it in the freezer for about 15 minutes. That’s it!

by

Cranberry Thumbprint Cookies

Yesterday I made some homemade healthy cranberry sauce.

Since it is not quite Thanksgiving, I had to find a way to use up the sauce I made.  So a cookie came to mind and Cranberry Thumbprint Cookies were born!

These are yummy and they are also a fun cookie to make with your kids.  I have made another version of these in the past and my daughter Meadow loved making the thumbprint in each cookie.  She loves eating them too as you can see in this next picture.

My other daughter Olive is to young for nuts, so she had applesauce.

Cranberry Thumbprint Cookies

1 cup rolled oats
1 cup almonds
1 cup spelt flour
1/3 cup maple syrup
1/4 cup coconut oil (measure after melting)
1/4 cup applesauce
2 T milk (I used almond milk)
Any fruit jam you like (I used homemade cranberry sauce)

Preheat oven to 350.  In a food processor, combine the oats and almonds and pulse into a powder. In a large bowl, combine the almond/oat mixture and flour.  In a small bowl combine the applesauce, maple syrup, oil and milk.  Mix wet into dry.  Roll dough into small balls and then flatten the balls with your hand.  Using your thumb, make a thumbprint into each cookie.  Spoon jam into each print.  Bake in the oven for 12-15 minutes.