Acorn Squash Stuffed with Wild Rice and Apples

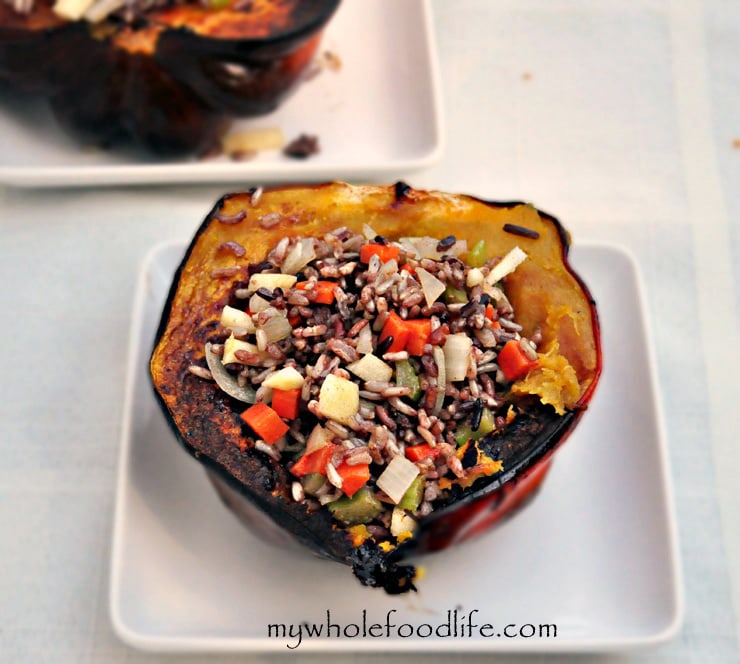
Let me just say that this recipe is so good!  I wanted to do a stuffed squash for Thanksgiving and we gave this a test run yesterday.  What usually happens is that I come up with the savory recipe ideas, and my husband Marcus puts them together.  He is an amazing cook and this is one of his creations.  I am more of a baker than a cook.  He has also came up with the Pumpkin Enchiladas and the Homemade Re-fried Beans.

Stuffed-Acorn-Squash-My-Whole-Food-Life

Usually, I am not a fan of fruit in savory dishes, but the apple works so well in this!  We will definitely be bringing these to our Thanksgiving celebration.  Yes, I know mine looks slightly charred in the photo, but this is real life and in real life, food doesn’t always look pretty.  It tastes amazing though! 🙂

Stuffed Acorn Squash with Wild Rice and Apples

Acorn Squash Stuffed with Wild Rice and Apples
Prep Time 20 min Cook Time 40 min

Ingredients

  • 1 acorn squash
  • 2-3 cups cooked wild rice
  • 3 celery stalks chopped
  • 2 large carrots chopped
  • 1 small onion chopped
  • 1 honey crisp apple diced (Another apple would work too. I just think the honey crisps have such good flavor)
  • 1 garlic clove minced
  • 1 tablespoon walnut oil (Another oil would be fine too)
  • 1/2 tsp cinnamon
  • 1/4 tsp ginger
  • salt to taste

Instructions

  1. Preheat oven to 400 and roast the squash for 40 minutes or until it’s done.
  2. Cook enough wild rice to make 2-3 cups of cooked rice.
  3. As the squash is roasting, chop the carrots, onion, and celery as well as mince the garlic.
  4. Add all of it to a pan under medium high heat and saute for 7-10 minutes.
  5. After the onions begin to become translucent, lower the heat to medium and add the rice and spices, including the salt.
  6. Stir well for a couple of minutes and remove from the heat. Let this mixture cool down significantly.
  7. Once the rice mixture has cooled off and is more of a lukewarm temperature, add the diced apples. You want these apples to retain their crispiness, so it is important to not add them too early or they will soften.
  8. Stir the apples in the mixture so they get coated in some of the oil from the pan. This will keep them from browning.
  9. When the squash is fully roasted, remove it from the oven.
  10. Once it has begun to cool, you can add the rice to the inside of the dish as shown and serve. Enjoy!

by

Recipe Notes

Friendly tip, you can tell when the squash is done when you are able to stick a fork through the skin easily.

Apple Spiced Refrigerator Jam

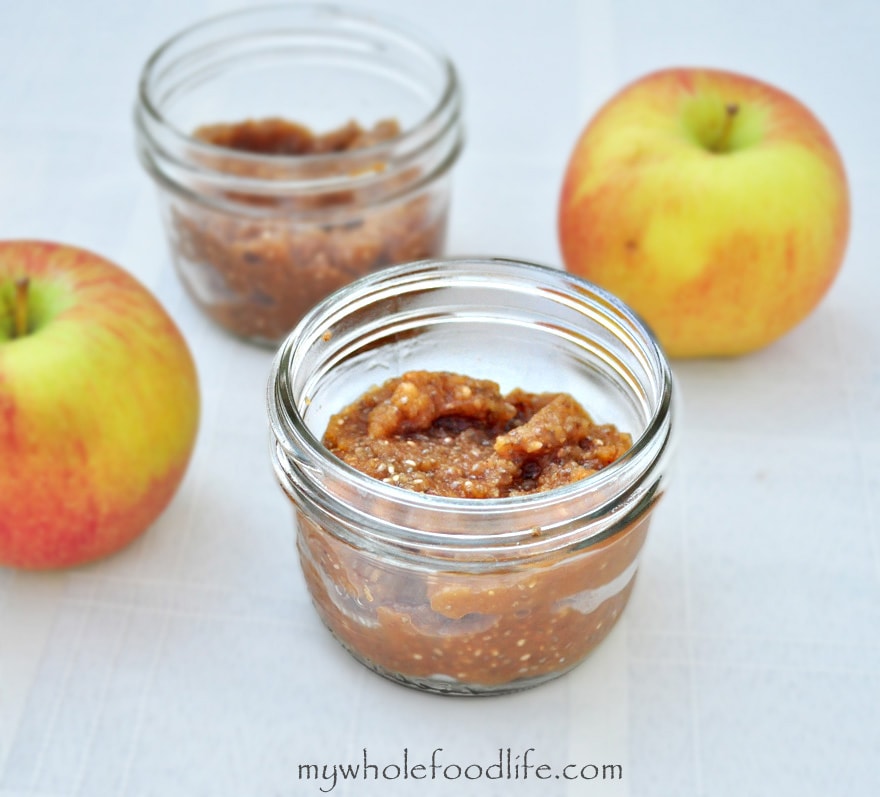
You need to try this Apple Spiced Refrigerator Jam.  Everyone likes a little jam once and awhile.  Most store bought jams contain too much processed sugar.

Did you know you can easily make your own jam recipe without processed sugar, pectin or canning?  I already have Blueberry Chia Jam on the blog.

Since it’s almost fall, I thought I would make one that incorporated those flavors.  This apple spiced jam recipe came out great.


Apple Spiced Refrigerator Jam Watermark

This is it and it couldn’t be any easier!  I used chia seeds to help gel up the spread.  This will literally take minutes to make.  Spread it on toast, swirl it in yogurt, or even use it as a pancake topping!  It would be great in overnight oats as well.  Yum!

Apple Spiced Refrigerator Jam

Apple Spiced Refrigerator Jam

Prep Time 10 min Serves 8 oz.     adjust servings

Ingredients

  • 2 apples peeled and cored (I saved the peels because my daughter likes to snack on them. Any apples will do. I used gala.)
  • 1 tsp cinnamon
  • 1/2 tsp nutmeg
  • 1/4 tsp ginger
  • 1/4 tsp cloves
  • 2 T maple syrup (This is optional. Taste the mixture and if it's not sweet enough, add the syrup.)
  • 2-3 T chia seeds

Instructions

  1. In the food processor , blend up the apples.
  2. Then add in the remaining ingredients and mix well.
  3. Put the jam in a covered container and set it in the fridge to set up. Takes about 30 minutes to an hour.

by

Recipe Notes

This made 8 oz of jam. I store mine in mason jars , but you can use any container. It should last a few weeks in the fridge and you can also freeze it for longer storage. Enjoy!

Farro with Spinach and Mushrooms

My husband loves to cook and often comes up with the savory dishes for the blog.  One of the more popular dishes that he has created is the Peanut Noodle Stir Fry.  I love to bake and stick mostly to doing that.  This is a dish he came up with.  I am going to be on a panel for a Google + hangout soon.  In preparation, Bob’s Red Mill sent me a box of their Grains of Discovery line.  Farro was one of the grains in the kit.  I have always wanted to try it and I am so glad I did.  It has a nutty taste and texture that goes very well with the mushrooms.

Farro with Mushrooms Watermark 2

If you are gluten free, wild rice or quinoa would work as well.  We ate ours warm, but I think it would be a great cold dish as well.

Farro with Spinach and Mushrooms

Farro with Spinach and Mushrooms

Ingredients

  • 3 cups vegetable broth
  • 1 1/2 cups farro
  • 1 8oz package of mushrooms sliced thin
  • 1/2 yellow onion (or 1 cup chopped)
  • 1 garlic clove minced
  • 2 T white wine vinegar
  • 1-2 handfuls of spinach
  • 2 T oil (I used walnut oil)

Instructions

  1. In a saucepan , add the farro and vegetable broth and cook on medium heat until all the broth is absorbed.  In another saucepan , saute oil, garlic, onion and white wine vinegar medium high heat and cook for about 6-8 minutes. 
  2. Add mushrooms and stir for another 5 minutes or so. 
  3. Once the farro is done, add it to the sauce pan with the mushroom onion mix. 
  4. Add salt and pepper to taste and lastly add in the spinach and cook until slightly wilted. 
  5. Remove from heat and serve immediately or refrigerate for later.  Enjoy!

by

Nut Free Snack Bars

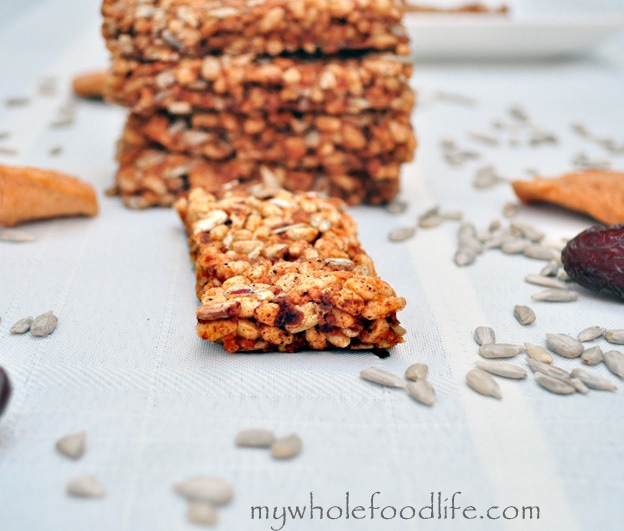
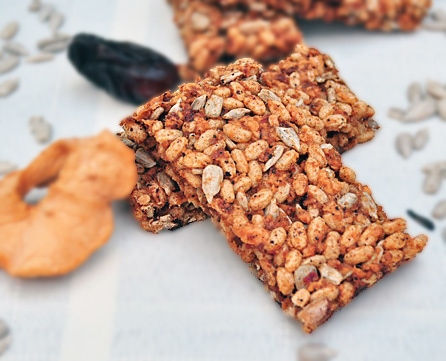
Let’s face it, a lot of schools are going nut free these days.  As a mom of a child with many food allergies, I totally get it.  That’s why I am trying to create some nut free snacks.  This one came out real good and it is so simple to make!

Nut Free Bars FG watermark

They were a hit with my daughter and husband.  One of the other great things about this bar is that it is only fruit sweetened.  No added sugar at all!  It almost reminds me of an apple cinnamon KIND bar.  I cooked mine for a few minutes, but I almost thing they can be made raw too.

Nut Free Snack Bars

Nut Free Snack Bars

Prep Time 10 min Cook Time 10 min

Instructions

  1. Preheat oven to 350. 
  2. Mix the cereal, sunflower seeds, cinnamon, vanilla bean and sea salt in one bowl
  3. In the food processor , mix the apples, dates and water until a syrup forms.  It will be slightly thick. 
  4. Get a sheet or parchment paper a little larger than the size of your pan, so you have some hanging out the sides.  I used an odd sized pan.  I think it was a 5X13?  A standard 8X8 pan will work just fine.
  5. Once the syrup forms, add that to the dry mixture and mix well. 
  6. Once everything is mixed, transfer the mixture to your baking pan. 
  7. Make sure the parchment is lining the pan first. 
  8. Once everything is in the pan,  press the mixture down firmly. 
  9. Bake for about 10 minutes. 
  10. When it cools, remove the bars from the pan by grabbing the parchment paper sides. 
  11. Cut into bars or squares with a pizza cutter .

by

Recipe Notes

I got about 10 bars out of my batch. These should last a week or two. You can even freeze them for longer storage.

Apple Pie Fruit Leathers

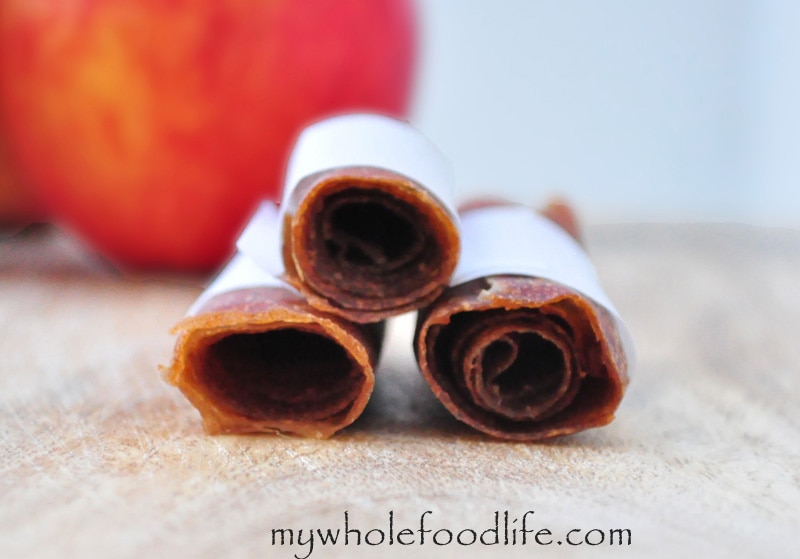
My kids love fruit leathers, but they are so expensive at the store.  So now I make my own.  It’s so easy and you can add in whatever fruits and spices you like.  I have peach fruit leathers on my blog already, and now I can add these to the list.

Apple Leather watermark

The house smells amazing when these are cooking, kind of like when I make my crock pot applesauce.  The best part is that you probably already have all the ingredients in your own cabinets!  I used applesauce to make mine, but you can most certainly use real apples and puree them first.  Think about it though.  When your store has a sale on applesauce, you can stock up and make these.  It would save a lot of money and make your kids happy too. I used a dehydrator to make mine, but you can certainly try this in the oven as well.  You just need to keep an eye one them.

Apple Pie Fruit Leathers

Apple Pie Fruit Leathers

Prep Time 20 min Cook Time 7 hr Serves 20 fruit leathers     adjust servings

Ingredients

Instructions

  1. If using an oven, preheat to the lowest setting or 135. 
  2. Put all ingredients in a bowl and mix well. 
  3. Line your baking sheets with parchment and spread the mixture out evenly. 
  4. Bake for about 4-6 hours, depending on how low the temp your oven will go. 
  5. If you are using a dehydrator , line the trays with parchment as well.  You can use the dehydrator sheets as well, but I think parchment is much cheaper and works great. 
  6. I baked mine in the dehydrator at 135 for about 6-7 hours. 
  7. Once it feels tacky, it’s pretty much done.  I got about 20 fruit leathers out of my batch.  Enjoy!

by

Gluten Free Herb Crackers and a Giveaway!

When I made my Homemade Wheat Thins the other day, a lot of you wanted a gluten free cracker as well.  This recipe is more for adults than kids, but it’s so good!  But first, let me tell you about the giveaway.

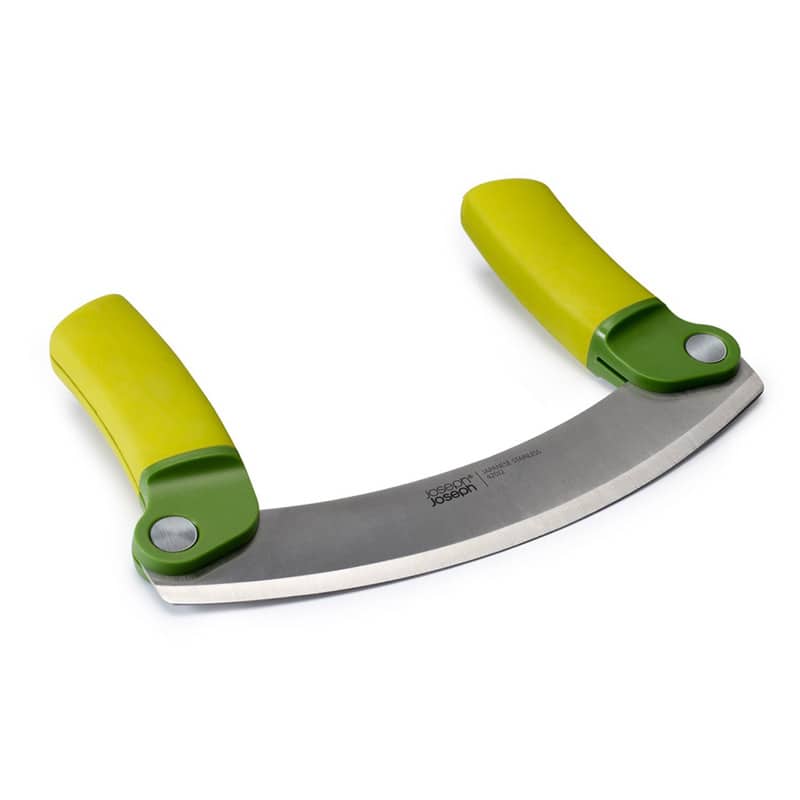
If you need help on your knife skills like I do, this giveaway is for you!  I used this mezzaluna from Joseph Joseph to cut the herbs in this recipe.  Let me tell you it worked so well!  Makes me wonder why it took me so long to get one!  Joesph Joseph is also going to give a mezzaluna to one lucky winner.

mezzaluna

All you need to do is:

Like My Whole Food Life on Facebook
Like Joseph Joesph on Facebook
Leave a comment under this blog post

Contest is open to US residents only. Winner will be chosen on  Tuesday, August 27, 2013.  Good luck!  Now onto the recipe.

This giveaway is now closed.

herb-crackers-watermark

Gluten Free Herb Crackers

Gluten Free Herb Crackers and a Giveaway!

Prep Time 20 min Cook Time 30 min Serves 30 crackers     adjust servings

Ingredients

  • 2 cups cooked brown rice or quinoa
  • 1 /4 cup chia seeds
  • 6 basil leaves chopped
  • 2 T fresh parsley chopped
  • 1 tsp fresh rosemary
  • 1 tsp fresh chives
  • salt and pepper to taste
  • About 4 T water

Instructions

  1. Preheat oven to 350. 
  2. In a food processor , blend up the rice and the chia seeds. 
  3. Then add in the remaining ingredients and pulse until a dough starts to come together. 
  4. Tear two pieces of parchment paper the size of your baking sheets
  5. Place 1 piece of parchment on the counter top. 
  6. Put half the dough onto the parchment. 
  7. Tear some plastic wrap to put between the rolling pin and the dough.  This will prevent the dough from sticking to the rolling pin
  8. Roll the dough out pretty thin. 
  9. Transfer the dough and the parchment paper to a baking sheet.
  10. Repeat these steps with the other half of the dough. 
  11. Bake in the oven for 15 minutes. 
  12. Remove the pans and carefully cut the dough into squares with a pizza cutter
  13. Carefully flip each square over and bake for another 15-20 minutes, or until crispy. 

by

Recipe Notes

You can probably do the whole thing in the dehydrator as well if you want to keep them raw. I got around 30 crackers in my batch. Store them in a container with dry rice scattered at the bottom. The rice will absorb the moisture and keep the crackers crispy. Enjoy!