Strawberry Banana Waffles

At our house, Sundays have a morning tradition of homemade waffles or pancakes.  Last week we had Blueberry Oatmeal Waffles.  This week, my daughter requested strawberry banana waffles.  So that is what we had.

waffles

I mix all the dry ingredients the night before so it takes only minutes to whip them up in the morning.  I got five large waffles out of this batch.  There were hardly any leftovers.  I used freeze dried strawberries for this recipe, so if you use fresh, you may need to slice them thin and use a little bit less liquid.

Do you have any weekend traditions?

Strawberry Banana Waffles

Strawberry Banana Waffles

Prep Time 10 min Cook Time 10 min

Ingredients

Instructions

  1. Mix all the dry ingredients and stir well.
  2. Then add the wet and mix only until combined. Be careful not to over mix. 
  3. That’s all there is to it.  I hope you all enjoy these as much as we did.

by

Coconut Cream Larabars

These Coconut Cream Larabars are where it’s at. No matter who you talk to, most everyone seems to love larabar,  My two most viewed posts on the blog are the Peanut Butter Granola Bars and the Homemade Clif Bars.

The first larabar recipe I created was the chocolate brownie.  I think these healthy larabars came out even better!

Coconut Cream Larabars

These literally took about 5 minutes to make.  Can it get any easier?  I love recipes like this.  The store bought Larabars cost $1.50 a piece.  That can get pretty pricey if you are buying a lot of them.  So here is my recipe.  I hope you like it as much as we did.

Some other larabar recipes you may enjoy:

Like this recipe?  Watch how to make it in the video below. For more videos, you can subscribe to my You Tube Channel.

Coconut Cream Larabars

Coconut Cream Larabars

Prep Time 20 min

Instructions

  1. Mix the almonds, coconut and cashews in the food processor until fine.
  2. Then add the dates, oil and water and pulse until a dough forms.
  3. Line an 8X8 pan with parchment paper leaving enough room for some to come out the sides. That way, the bars will be easy to remove and cut with a pizza cutter.
  4. Press down the down so that it is packed well and place in the fridge to set.
  5. It will take an hour or two. Slice and eat. These should keep in the fridge for a couple weeks.

by

Minestrone Soup (Slow Cooker Recipe)

Minestrone Soup.  I just love soups.  If you have been reading this blog for awhile now, then I am sure you have realized that.  This slow cooker soup is my latest recipe.

I also created a post recently including 6 Healthy and Filling Soups.  I will probably have to add this slow cooker minestrone to it.


Minestrone Soup


This healthy and hearty soup is hearty and filling and it was perfect for the chilly day we had inTexas yesterday.  Soups are great because they are very budget friendly.  They also freeze well, so soups are great for batch cooking.


Looking for more soup recipes?

We also shot a short video for this recipe.  You can view it below. For more videos, please subscribe to my You Tube Channel.

Minestrone Soup

Minestrone Soup

Prep Time 20 min Cook Time 6 hr

Ingredients

  • 4 cups vegetable stock
  • 1 28 oz can diced tomatoes or 3.5 cups homemade diced tomatoes
  • 4 stalks celery chopped
  • 4 carrots chopped
  • 1 onion chopped
  • 1.5 cups green beans chopped
  • 4 cloves garlic diced
  • 1 1/2 T fresh basil chopped
  • 1/2 tsp oregano (I used dried)
  • 2 cups pasta (I used quinoa pasta )

Instructions

  1. In a food processor , chop the carrots, onion and celery fine.
  2. Throw that mixture and all the other ingredients except the pasta in the crock pot
  3. Cook on high for the first hour, then turn to low and cook for a few more hours.
  4. Add the pasta in for the last 20 minutes of cooking and test a piece before you turn the crock pot off.

by

Recipe Notes

We got about 6 good size servings out of this recipe.

Minestrone soup

Homemade Chocolate Larabars Recipe

Homemade Chocolate Larabars.  Everyone seems to love energy bars.  They’re quick, easy and travel well.  Store bought brands can cost over $1.50 a piece, so I have set out to make some homemade versions.

First I came up with a Clif Bar recipe, then a KIND bar and now homemade chocolate brownie larabars.  This chocolate larabars recipe is just a first of several flavors to come.


Homemade Chocolate Larabars


These homemade larabars took only a few minutes to mix up.  I think the taste was pretty spot on.  I would store them in the fridge just to be sure they stay firm.

These should keep in the fridge for at least a week if not more.   You can also freeze them!

Homemade Chocolate Larabars

Homemade Chocolate Larabars

Prep Time 15 min

Ingredients

Instructions

  1. In the food processor , mix the dates and water until a paste forms.
  2. Add in the cocoa powder and almonds and continue to pulse until a dough comes together.
  3. Line an 8×8 baking dish with parchment leaving enough room for some to stick out the sides. That way the bars will be easier to pull out. 
  4. Place in the fridge to firm up for a couple hours.

by

Homemade KIND Bars (Vegan and Gluten Free)

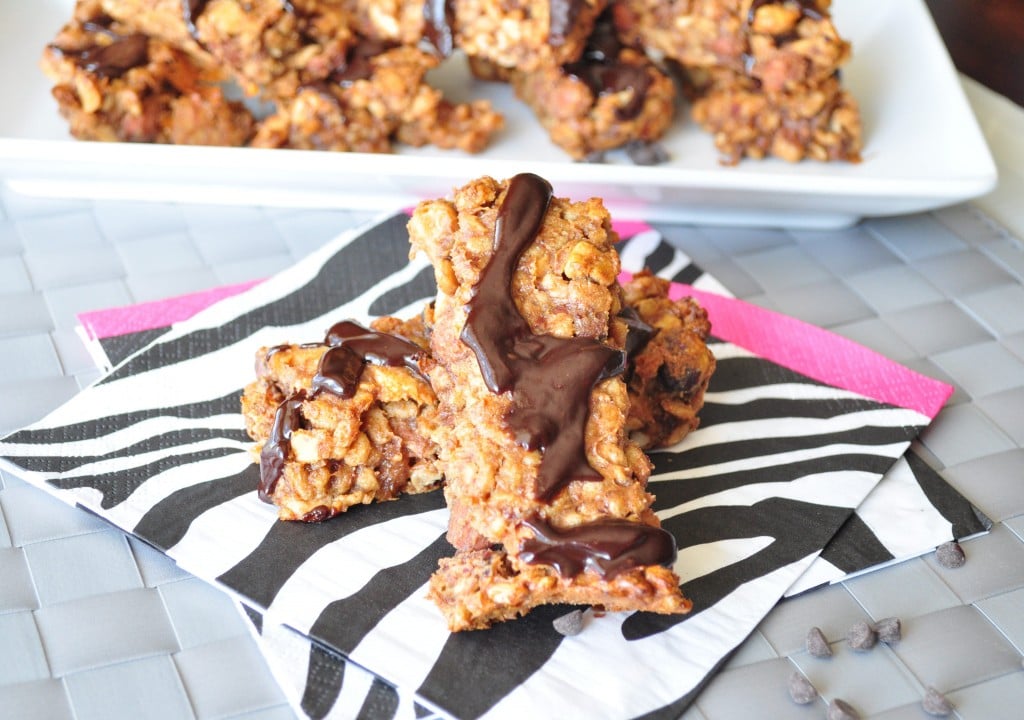
Homemade KIND Bars.  After my Homemade Clif Bars were such a hit, I asked all of you which bar you would like to see next.  The answers were all asking for KIND bars.

I had never even tried one, so I went to the store and bought one to try.  The first flavor I attempted was Peanut Butter Chocolate.  I have plans for more homemade KIND bars in the future. 🙂


Homemade KIND Bars


These KIND bars, along with my Clean Eating Samoas,  are kind of involved; but I think they turned out pretty good!

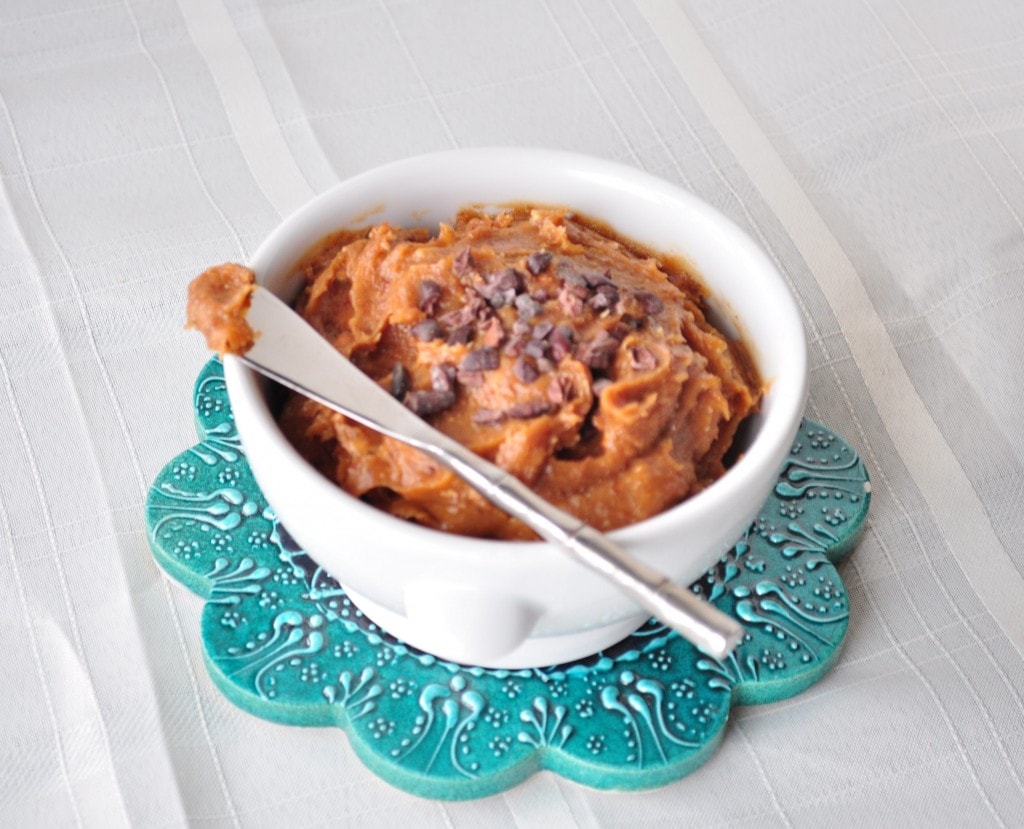
I used my Sweet Peanut Butter Spread as inspiration for the ingredient that binds this bar together.  So here is the recipe.  I got about 10 bars out of the recipe, but mine are quite thick.

Homemade KIND Bars

Homemade KIND Bars

Prep Time 10 min Cook Time 20 min

Ingredients

  • 2 cups mixed nuts chopped (I bought mine out of the bulk bin)
  • 2 cups brown rice cereal (I used Nature's Path)
  • 12 medjool dates pitted
  • 1/2 cup natural peanut butter
  • 3/4 cup water

For the chocolate coating

Instructions

  1. Preheat oven to 325.
  2. In a large bowl , mix the nuts and cereal.
  3. In the food processor , pulse the dates and water until a thin paste forms.
  4. Add in the peanut butter. If you store your peanut butter in the fridge, pull it out a few hours ahead of time so it will be soft.
  5. Once all those are combined well, add it to the nuts and cereal.
  6. Mix well until everything is combined.
  7. I used an 8×8 baking dish, but I would suggest using a slightly bigger one because my bars came out a bit on the thick side.
  8. Line your pan with parchment paper leaving enough room for some paper to come out the sides so it’s easy to pull the bars out after baking.
  9. Press batter into the pan so it is coated evenly and then press down hard with the spatula. The batter will be very sticky.
  10. Bake for about 20-30 minutes.
  11. Let the bars cool before pulling them out of the pan.
  12. Once cooled and out, slice into bars, spread out and bake for another 18 minutes.  I cut my bars easily with a pizza cutter .

For the chocolate coating:

  1. Using a double boiler, melt the chips and milk together.
  2. Once a smooth and runny consistency is reached, drizzle over the bars and place in the fridge to set. 
  3. I had some chocolate left over, so if you want, you can dip the bottom of each bar in to coat as well.  That way, they will be a bit more like the real bars.  Hope you enjoy these.

by

Sweet Peanut Butter Spread

This is so much more than peanut butter…

Sweet Peanut Butter Spread

I have big plans for this stuff in future recipes.  My husband just loves peanut butter.  He really loves making peanut butter and honey sandwiches at night as a sweet treat.  He used to love Nutella, but vegans can’t eat it and it’s not all that healthy anyway.  This is the peanut butter version of Nutella.  It would also make a great peanut butter fudge if left to chill in the fridge.  It could be used as a healthier alternative to frosting as well.  It would be delicious for the filling of my Thumbprint Cookies.  Heck, you can even sit there and eat it as is, which is what I did.  Ooops, did I say that allowed?  Warning….this is highly addictive.

Sweet Ingredient Peanut Butter Spread

Sweet Peanut Butter Spread

Prep Time 20 min

Ingredients

  • 15 medjool pitted dates
  • 1/2 cup natural peanut butter
  • 1/4 cup water

Instructions

  1. Combine the water and dates in the food processor and blend until a paste forms.
  2. Then, add the peanut butter and continue to blend until smooth. That’s it. Store in the fridge. Should last a couple weeks.

by