Cranberry Coconut Granola

I have probably mentioned on more than one occasion how much I love homemade granola. Maybe you got the idea after I posted All Things Granola. Not only is homemade granola a great way to start your day, but it makes a great little snack in the afternoon when you are craving something sweet.  This is my latest homemade granola recipe.  If you like cranberries and coconut, you will love this homemade granola.

Cranberry Coconut Granola

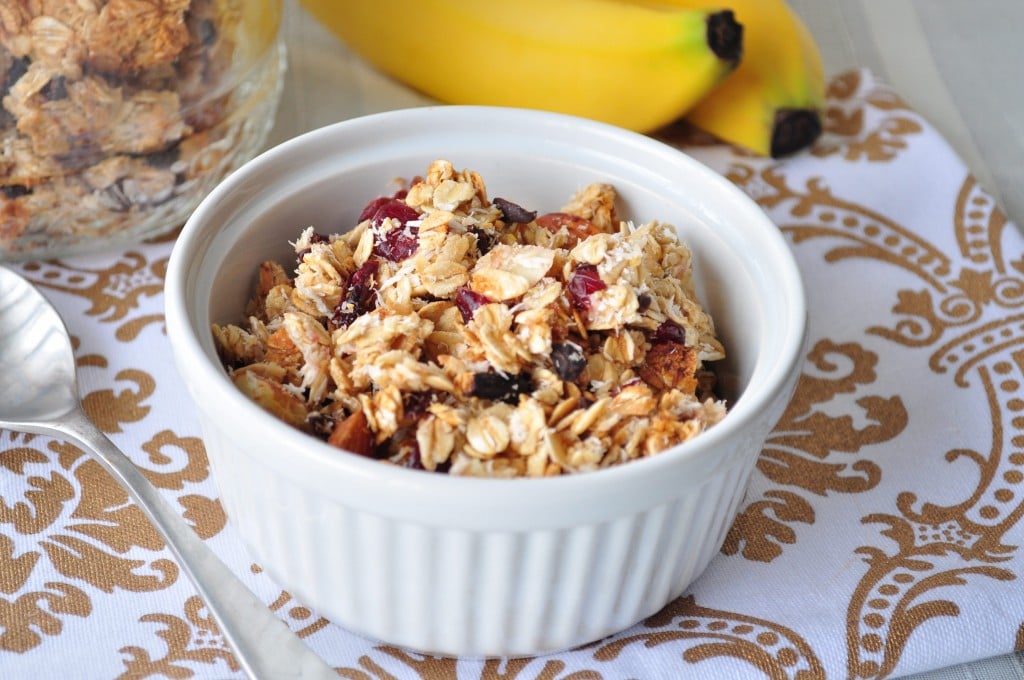
This recipe doesn’t make much more than 2-3 servings so if you want, feel free to double the batch.  Granola would also taste great on top of my Chia Seed Pudding.

Cranberry Coconut Granola

Cranberry Coconut Granola

Prep Time 10 min Cook Time 30 min

Ingredients

Instructions

  1. Preheat oven to 350.
  2. Mix all the dry ingredients in one bowl . Mix wet in another. Add wet to dry and mix until everything is coated. 
  3. Spread mixture onto a lined baking sheet .
  4. Bake in the oven for about 30 minutes. Shake pan about halfway through. If the granola is not crunchy enough, feel free to cook a bit longer.

by

Chia Seed Pudding (Vegan and Gluten Free)

This Chia Seed Pudding makes the perfect healthy breakfast!  I am not just talking about a ch-ch-ch-chia pet here.  Have you tried chia seeds?  They are super good for you.

I have only just tried them recently me myself.  Chia is the Mayan word for strength.  These little seeds were a big staple of the Aztec and Mayan diet.

One single serving of chia seeds contains 42% of your daily need for fiber and it packs more omega 3 fatty acids than a piece of salmon.

Chia seeds will absorb up to 12 times their own weight, making you feel full longer.  They are great to throw in smoothies and pudding.


Chia-Seed-Pudding

This dish is loosely adapted from Food Babe’s Chia Seed Fruit Salad.  This chia seed pudding would be great served as breakfast or dessert.  It would also be great with some of my homemade granola sprinkled on top.

Chia Seed Pudding

Chia Seed Pudding

Prep Time 5 min Serves 4 servings     adjust servings

Get some superfoods into your diet with this yummy pudding!

Ingredients

Instructions

  1. Throw all the ingredients in a bowl and chill in the fridge for a few hours.

by

Recipe Notes

This chia seed pudding takes all of 5 minutes to make and will keep you full for a long time afterward.

Marinated Vegetable Salad (Vegan & Gluten Free)

Marinated Vegetable Salad.  This is a dish we have been making for a long time.  We got the recipe from my mother-in-law.  I love cold salads.

I recently wrote 5 Quick and Easy Salad Ideas that included a lot of my other salad recipes.  They taste great and don’t take much effort at all.  My kind of recipe if you haven’t noticed by now!


Marinated Vegetable Salad


We used dried beans for the recipe and just soaked them all in one big jar overnight, and then boiled them in the morning for about 15-20 minutes until they became soft.

Then, we let them cool before putting this recipe together.  Dried beans are far cheaper and taste much cleaner too.  I never noticed that until I started eating them on a regular basis.


Marinated Vegetable Salad


Want to make this recipe?  Watch the video below.  For more videos, you can subscribe to my You Tube Channel.

Looking for more salad recipes?


Marinated Vegetable Salad

Marinated Vegetable Salad

Prep Time 10 min

Ingredients

  • 2 cups chickpeas
  • 2 cups kidney beans
  • 2 cups pinto beans
  • 2 cups corn (I used frozen)
  • 3 -4 T red wine vinegar
  • 2 T olive oil
  • 2 garlic cloves
  • 1/2 tsp salt
  • 1/2 tsp oregano
  • 1/2 tsp cumin
  • 3 green onions chopped
  • 3 stalks celery
  • 1/4 cup flat leaf parsley chopped

Instructions

  1. Whisk together the vinegar, oil, garlic, oregano, cumin and salt in a bowl.
  2. Add the beans and corn.
  3. Then, add the onions,celery and parsley and toss to coat.

by

Recipe Notes

You can eat this right away, but for the best flavor, please let sit in the fridge for at least 8 hours. That’s it. Easy! This makes about 6 good size servings servings. It should keep for at least a week in the fridge.

Marinated Vegetable Salad

Blueberry Oatmeal Waffles (Vegan)

Blueberry Oatmeal Waffles. So I got this waffle iron about a month ago.  My first few attempts at healthy waffles were epic fails.  Today I finally came out with a winning recipe!

These blueberry oatmeal waffles came out great!  My kids really enjoyed having these blueberry oatmeal waffles.  I hope you enjoy them too!


Blueberry Oatmeal Waffles


I got some organic blueberries from Sprouts yesterday and they were so good!  Blueberries are on the “dirty list, so I only buy them organic and in season.  I haven’t had them in months.  When I saw them sitting there, I had to snatch up a couple pints.

So glad I did because they were sweet and juicy!  We got some yummy strawberries too.  So good!  Waffles and pancakes are super easy to whip up fast.  I actually mix the dry ingredients the night before, so it takes just a minute or two to add the wet in the morning.

My daughter made a happy plate, as we like to call it around here.  She loved them!  If you don’t have a waffle iron, try one of my Homemade Granola Recipes or my Peanut Butter Pancakes for your Sunday morning breakfast.

Blueberry Oatmeal Waffles

Blueberry Oatmeal Waffles

Prep Time 10 min Cook Time 10 min

Ingredients

  • 3/4 cup oat flour
  • 1/2 cup spelt flour
  • 1 1/2 cups milk (I used almond milk)
  • 1/2 cup rolled oats
  • 2 tsp baking powder
  • 1 T maple syrup
  • 2 T coconut oil
  • 1 egg (I used a flax egg replacer)
  • 1/3 cup shredded coconut
  • 3/4 cup blueberries (I used fresh)

Instructions

  1. Preheat the waffle iron.
  2. Mix all the dry ingredients together in one bowl.
  3. Mix wet in another.
  4. Add wet to dry and mix well.
  5. Fold in blueberries.
  6. Spray the waffle iron with oil before spooning batter on each time.
  7. I used a 1/2 cup measuring cup to scoop the batter onto the waffle iron.

by

Recipe Notes

I got 4 large waffles out of my batch. If you have leftovers, you can freeze them in a plastic container with parchment in between each waffle.

Homemade Clif Bars (Vegan and Gluten Free)

Homemade Clif Bar recipe.  When I made my Healthy Cookie Dough Bites the other day, I thought the flavors would be a great base for Homemade Clif Bars.

So, I set out to create them.  A lot of readers lately have been asking if Clif bars are okay to eat.  I used to but them by the case as well.  I would take them to work in the days when I waited tables on the Las Vegas strip.

Here are the ingredients to the Chocolate Chip Peanut bar that I got off their website:

Chocolate Chip Peanut Crunch:

Organic Brown Rice Syrup, ClifPro® (Soy Rice Crisps [Soy Protein Isolate, Rice Flour, Barley Malt Extract], Organic Soy Flour, Organic Roasted Soybeans), Organic Rolled Oats, Organic Toasted Oats (Organic Oats, Organic Dried Cane Syrup, Ascorbic Acid, Natural Vitamin E [Antioxidant]), Organic Cane Syrup, Organic Peanut Butter (Organic Peanuts, Salt), Chocolate Chips (Dried Cane Syrup, Unsweetened Chocolate, Cocoa Butter, Soy Lecithin, Vanilla Extract), Peanut Flour, Peanuts, ClifCrunch® (Organic Oat Fiber, Apple Fiber, Inulin [Chicory Extract], Psyllium, Organic Milled Flaxseed), Organic Date Paste, Natural Flavors, Sea Salt.

Wow!  That’s a lot of ingredients!  Soy protein isolate is a hidden form of MSG.  There are also “natural flavors” in these.  Those two things alone would make me put these back on the shelf nowadays.  So, moving on to my homemade clif bars.

My homemade clif bar recipe is great because it serves as a good base for you to add whatever kind of flavors you like.


Homemade Clif Bars


These would go great with a glass of Homemade Almond Milk.

Homemade Clif Bars

Homemade Clif Bars

Prep Time 10 min Cook Time 20 min

Instructions

  1. Preheat oven to 325.
  2. Grind up the oats and almonds in the food processor .
  3. When they have a crumbly consistency, add the dates and coconut.
  4. Lastly add the water slowly as you pulse the ingredients together until a batter forms. It will be thick and sticky.
  5. Line an 8X8 pan with parchment paper leaving enough paper sticking out on each side so you will be able to lift the whole thing out when done.
  6. Working carefully, spread batter evenly out to all the sides.
  7. Press mixture down with a spatula to get it firm.
  8. Bake in the oven for about 20 minutes.
  9. Let cool completely before removing intact.
  10. Cut bars with a pizza cutter .

by

Curried Kidney Beans and Corn

This is a dish that my husband and I have been making for a long time.  In fact, we made it so often, that we got tired of it for awhile.  We also did that with our Black Bean Veggie Burgers.  We decided to make it again because it had been months since we last had it.  If you are thinking about trying something different, I suggest you give this one a try.  It would be a great dish for you to test out whether you like curry and tumeric.

Curried Kidney Beans and Corn

This is also very inexpensive and easy to make.  It makes a fairly good amount too.  Just a warning though, tumeric will stain, so make sure to use cooking utensils that are not white.  I made that mistake and now mine is yellow. 🙂

Curried Kidney Beans and Corn

Curried Kidney Beans and Corn

Prep Time 10 min Cook Time 30 min

Ingredients

Instructions

  1. In a food processor, mix the onions and garlic. 
  2. Once chopped well, transfer to a large pan with oil and cook the them down a bit.  About 5-7 minutes. 
  3. Once onions and garlic are cooked a bit, add in the beans, corn, spices, salt and about 1 cup of water. 
  4. Bring to a boil. 
  5. Once boiling, turn down, cover and simmer for about 20-30 minutes or until all the water has been boiled off.

by

Recipe Notes

You can eat this alone, add it to rice or even top it with some tofu or meat if you are an omnivore. Super easy and healthy.