Grain Free Pumpkin Pie

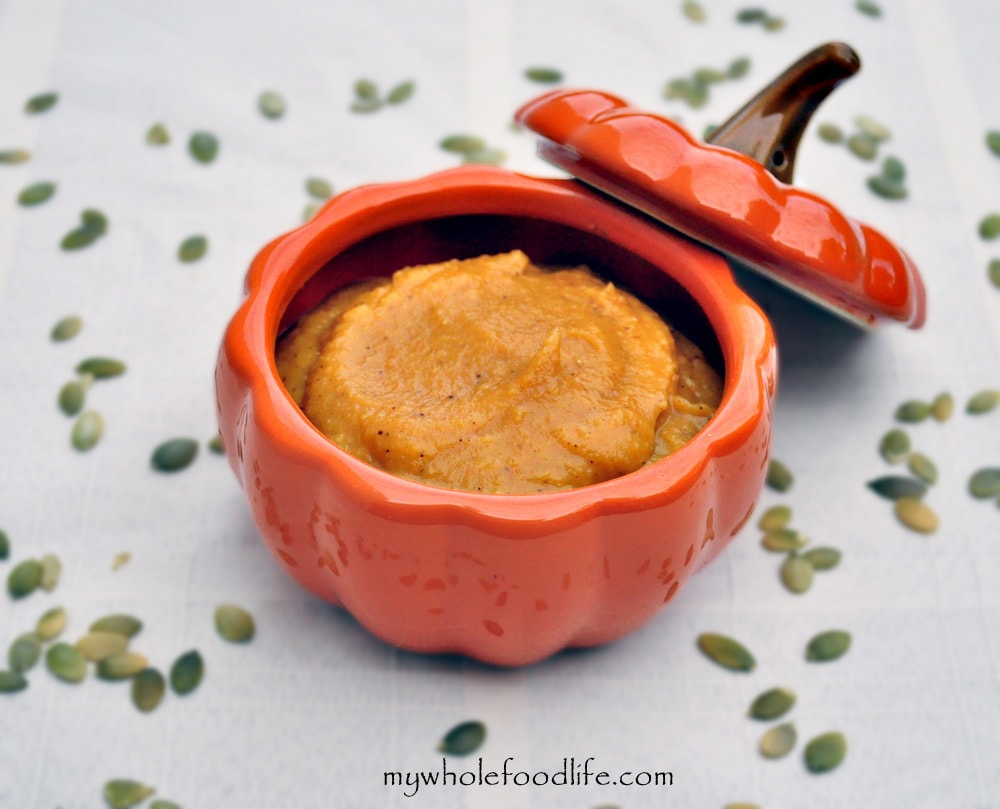
Grain Free Pumpkin Pie.  Who doesn’t like pumpkin pie? I find people will scour the internet for a good pumpkin pie recipe this time of year too.

I’ve been trying pretty hard to get a pumpkin pie recipe just right.  I have had several fails.  I am happy to tell you that this grain free pumpkin pie is delicious.

This pumpkin pie is not only grain free, but it’s vegan, gluten free and soy free as well!  So I am happy to say I finally have a healthy grain free pumpkin pie recipe that is good enough to share!


Grain Free Pumpkin Pie


This pumpkin pie even got the thumbs up from my girls.  They both wanted to eat it before I had a chance to take photos!  Just for the record, they claim to not like pumpkin. 🙂

For the crust, I decided to use a recipe from Elena’s Pantry.  Because, why mess with perfection?  Her crust recipe is amazing and so simple.

I hope you enjoy this pumpkin pie recipe as much as we enjoyed eating it.

Grain Free Pumpkin Pie

Grain Free Pumpkin Pie

Prep Time 20 min Cook Time 60 min Serves 1 pie     adjust servings

Ingredients

    For the crust

    For the filling

    Instructions

    For the crust

    1. Preheat oven to 350.
    2. In a food processor, mix the flour and salt. Then add in the egg and coconut oil and mix until a dough starts to form.
    3. Once the dough forms, press it into a greased glass pie dish . I used a 9 inch. Bake it in the oven for about 9-11 minutes.

    For the filling

    1. In a food processor , blend all the filling ingredients until smooth.
    2. Pour into baked pie crust and bake in the oven at 350 for about 50-60 minutes.

    by

    Recipe Notes

    When mine was done cooling, it still felt slightly loose, so I put it in the fridge and it completely firmed up. That worked out great. I think that arrowroot is just a tad less stable than cornstarch. However, it is free of GMOs and that’s why I used it over cornstarch. Enjoy!

    Gluten Free Pumpkin Pie Pop Tarts

    I made you gluten free pumpkin pie pop tarts.  Yes you read that title right. While I was at Target the other day, I happened to notice a box of Pumpkin Pie Pop Tarts.

    You can see the very long list of ingredients here. That gave me an idea to create my own gluten free pop tart recipe.

    My gluten free pop tart recipe is healthier than that boxed version.  I filled these with a pumpkin pie filling, but you can really fill them with whatever you like.

    gluten free pumpkin pie pop tarts

    I used the base recipe for my Homemade Pop Tarts and just changed a few things around.  These came out 10 times better than my original pop tart recipe.  These would be great with a glass of almond milk.

    Gluten Free Pumpkin Pie Pop Tarts

    Gluten Free Pumpkin Pie Pop Tarts

    Prep Time 40 min Cook Time 25 min Serves 6 - 7 pastries     adjust servings

    Ingredients

      For the dough

      For the filling

      Instructions

      1. Preheat oven to 350. 
      2. In a small bowl , mix up the filling and set aside.
      3. In another bowl , add all the dry ingredients for the dough. 
      4. In a mixing bowl , add the wet ingredients and mix. 
      5. Slowly add the dry ingredients to the wet, while mixing.  If the mixture looks slightly dry, add a little more milk. 
      6. Once the dough has formed, gather it into a ball and wrap it in plastic.  It will be sticky. 
      7. Store it in the fridge for 25-30 minutes. 
      8. Once the dough is firm, pull it out and cut it in half. 
      9. Line your counter with parchment paper the size of your baking sheet .
      10. Take one half of the dough and place it on the parchment paper. 
      11. Put the plastic wrap between the dough and the rolling pin, and roll it out to a 1/4 inch thickness. 
      12. Spread the filling on top.  Then roll out the other half of the dough the same way as the first. 
      13. Once it’s rolled out, carefully place it on top of the other half of the dough. 
      14. Very carefully, peel the parchment paper off.
      15. Transfer the whole thing to your baking sheet
      16. Cut the dough into squares using a pizza cutter .
      17. Bake in the oven for 15-17 minutes.

      by

      Recipe Notes

      I got 6-7 out of my batch. I cut them larger. They should last a few weeks if kept in the fridge. Enjoy!

      Chocolate Pistachio Truffles

      A few weeks ago, my husband made some amazing pumpkin enchiladas.  They had a pistachio dust on top.  Well he ground up too many pistachios and I have been wondering what to do with them ever since.  So I decided to make chocolate pistachio truffles.

      chocolate truffles watermark

      These chocolate pistachio truffles remind me of chocolate ganache.  They simply melt in your mouth.  I think it is due to the pecan butter I added.  If you haven’t tried pecan butter, you need to!  Amazing stuff.  There are dates in these chocolate pecan truffles, but I honestly can’t even taste or detect them at all.  This easy dessert can be made in a matter of minutes.  Vegan, gluten free and grain free. 🙂

      Chocolate Pistachio Truffles

      Chocolate Pistachio Truffles

      Chocolate Pistachio Truffles

      Serves 10 truffles     adjust servings

      No fuss truffles that are melt in your mouth delicious!

      Ingredients

      Instructions

      1. In the food processor or blender , combine the pecan butter and dark chocolate.
      2. Once they are mixed well, add in the dates and salt and mix until well combined.
      3. A ball of dough will form.
      4. Spread your chopped pistachios onto a plate.
      5. Roll the dough into balls, then roll the balls through the chopped pistachios.
      6. Once that is done, place the balls on a lined baking sheet .
      7. Once all the balls are done, stick the baking sheet into the fridge to firm up.

      by

      Savory Pumpkin Dip

      Most of you wanted more pumpkin, so here is another recipe.  This one is savory and really good!  It’s kind of a pumpkin version of hummus made with different ingredients.

      Pumpkin White Bean Dip Watermark

      This dip would be great with chips, crackers or veggies.  Great for those holiday parties and a healthy alternative to traditional veggie dips.  No added fats in here at all. 🙂  The flavors are very similar to those in my Smokey Roasted Chickpeas.  It comes together in just minutes.  If you enjoy savory pumpkin recipes, then you may also enjoy my Pumpkin Enchiladas.

      Savory Pumpkin Dip

      Savory Pumpkin Dip

      Prep Time 10 min Serves 1.5 cups     adjust servings

      Ingredients

      Instructions

      1. In a food processor or blender , combine all the ingredients until smooth.

      by

      Recipe Notes

      Serve immediately or refrigerate for later. This should last a couple weeks in the fridge and can even be frozen. This recipe makes about 1 1/2 cups dip. Enjoy!

      Epic Chickpea Spread

      Recently, a vegan bakery opened up here in Dallas.  Reverie Bakeshop is the name, and if you haven’t checked them out yet, you should.  Lots of yummy treats.  Anyway, they sell sandwiches as well.

      One of them is a mashed chickpea and avocado panini.  I haven’t tried it yet, but it sounded interesting and I thought I would experiment with my own version.  You really can’t go wrong with avocados in my opinion. 🙂


      This is super easy to make and very versatile too.  It would be great spread on my Homemade Wheat Thins, on toast or even inside a lettuce wrap for a grain free option.  Since everyone is worried about the mercury levels in tuna, this is a decent alternative.


      We filmed a short video for this recipe.  You can view it below. For more videos, you can subscribe to my You Tube Channel.

      Epic Chickpea Spread

      Epic Chickpea Spread

      Prep Time 15 min

      Ingredients

      • 2 cups or 1 can chickpeas
      • 1 avocado
      • 2 green onions chopped or 2 T minced white onions
      • 1-2 garlic cloves minced
      • 1/4 cup chopped fresh parsley
      • 1/2 celery stalk chopped fine
      • 1-2 T nutritional yeast
      • 1-2 T lemon juice depending on how much you like
      • salt and pepper to taste

      Instructions

      1. In a medium sized bowl, mash the chickpeas slightly with a fork. 
      2. Add in the remaining ingredients and mix well.

      by

      Recipe Notes

      This makes about 4 servings. Should last a week in the fridge. Enjoy!

      Healthier Peanut Butter Rice Krispy Treats

      Who doesn’t have memories of making and eating rice crispy treats as a kid?  Let’s take a look at the ingredients in the store bought version taken off their website.  I couldn’t find the peanut butter ingredients, but here is everything in the original flavor:

      TOASTED RICE CEREAL (RICE, SUGAR, SALT, MALT FLAVORING, NIACINAMIDE, REDUCED IRON, RIBOFLAVIN [VITAMIN B2], FOLIC ACID), MARSHMALLOW (CORN SYRUP, SUGAR, GELATIN, NATURAL AND ARTIFICIAL FLAVOR), FRUCTOSE, MARGARINE (VEGETABLE OIL [SOYBEAN AND PALM OIL WITH TBHQ FOR FRESHNESS], WATER, NATURAL AND ARTIFICIAL BUTTER FLAVOR [CONTAINS MILK], DATEM, ACETYLATED MONOGLYCERIDES, BHT FOR FRESHNESS, VITAMIN A PALMITATE, VITAMIN D), CORN SYRUP SOLIDS, CONTAINS TWO PERCENT OR LESS OF DEXTROSE, GLYCERIN, SALT, NIACINAMIDE, PYRIDOXINE HYDROCHLORIDE (VITAMIN B6), THIAMIN HYDROCHLORIDE (VITAMIN B1), RIBOFLAVIN (VITAMIN B2), SOY LECITHIN.

      Wow!  That’s a lot of ingredients!  Plus a lot of things I try to avoid.  My recipe contains just 4 ingredients.

      Rice Krispy Treats Watermark

      I wanted to create a healthier version for my kids.  It took me 3 tries to get it right, but the end product is really good with no added sugar.

      Peanut Butter Rice Krispy Treats

      Healthier Peanut Butter Rice Krispy Treats

      Prep Time 10 min Cook Time 10 min

      Ingredients

      • 4 cups rice cereal (I used Barbara's Brown Rice Crisps)
      • 3/4 cup peanut butter
      • 12 medjool dates (pits removed)
      • 3 T coconut oil (measure after melting)
      • water

      Instructions

      1. In a food processor , mix the dates with enough water so a syrup starts to form. 
      2. The syrup should be thicker, almost like a caramel.  I used about 1/4 cup water. 
      3. Once the dates are in a syrup, transfer them to a saucepan with the peanut butter and coconut oil. 
      4. Stir on medium heat just enough to soften the peanut butter and combine all the ingredients. 
      5. Once that is done, add them to a bowl with the cereal and mix until everything is well combined.
      6. Line an 8×8 pan with parchment paper, leaving enough paper to stick out the sides. 
      7. Pack the mixture down tight and stick it in the fridge to set. 
      8. Once it’s set, pull the bars out using the parchment paper and cut into squares with a pizza cutter .

      by

      Recipe Notes

      My bars were thick. If you want a thinner bar, use a slightly bigger pan. I got 9 squares out of my batch. They should last a couple weeks in the fridge. Enjoy!