Tropical Popsicles

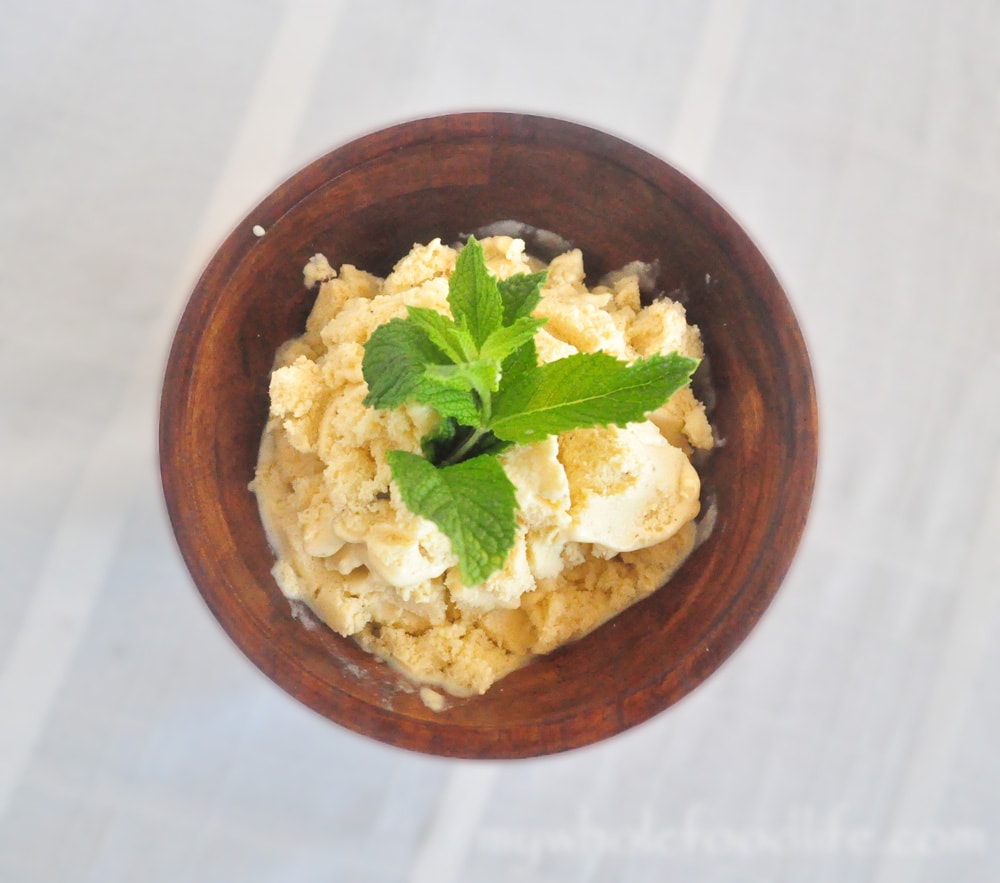
I love making my own popsicles.  These tropical popsicles are my latest creation  Most store bought brands contain unnecessary ingredients.  When I make my own, I can create whatever I like.  I even take requests from the girls.  It’s been so hot here in Texas, so a frozen treat is perfect. These tropical popsicles are awesome. They are cool and refreshing, and well… tropical.

Tropical Popsicles

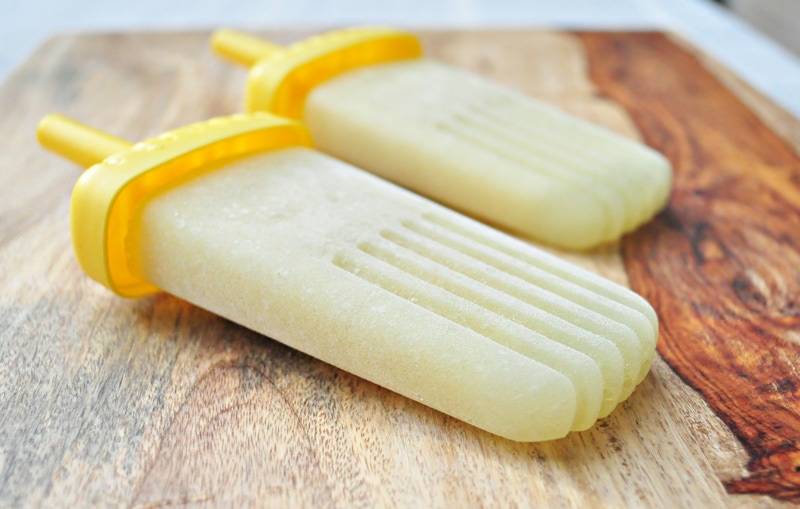
These tropical popsicles are very easy to make.  Did you know that coconut water is a natural electrolyte replacement?  It totally is!  Much better than Gatorade.  Tastes better too!  These would make the perfect post workout snack.  I hope you enjoy them.

Tropical Popsicles

Tropical Popsicles

Prep Time 10 min Serves 6 popsicles     adjust servings

Ingredients

  • 2 cups fresh pineapple cubed
  • 2 cups honey dew melon cubed
  • 1 banana
  • 1 cup coconut water

Instructions

  1. Blend all the ingredients in a blender for about 1-2 minutes.
  2. Pour into popsicle molds . You can also use smoothie pop molds . That’s it! Enjoy!

by

Raspberry Nutella Tarts

I have said this before, but growing up with a German mother meant we ate a lot of Nutella.  I loved it as a child.  Now I know that store bought Nutella is very unhealthy.  So I have created my own Healthy Homemade Nutella.  I have used it in many dishes on this blog.  Now it is time for a Raspberry Nutella Tart.

Nutella Tart 2 watermark

We all need to enjoy a tart every once and a while.  I love them and they are perfect for summer.  There is no cooking involved!  These are completely raw.  They are also vegan, grain free and gluten free!  If you feel compelled to cook the crust, you can.  You just don’t need to.  These are very easy to make even though they look kind of fancy.

Raspberry Nutella Tarts

Raspberry Nutella Tarts

Prep Time 30 min Serves 5 tarts     adjust servings

Ingredients

    For the crust

    For the filling

    For the fruit

    • 2 cups fresh raspberries or strawberries

    Instructions

      For the crust

      1. In a food processor , grind up the almonds until they are a course consistency.
      2. Once they are ground, add in the dates and water until the dough comes together. If you are not using a high powered food processor , you might want to soak the dates for 5 minutes in water to soften them.
      3. Grease your tart pan or mini tart pan s and then press the dough into the pan and up the sides. The dough will be sticky and I find that working with wet hands helps.
      4. Once the dough is set into all the tarts, place them in the fridge to firm up. About 30 minutes.

      For the filling

      1. While the tarts are setting up, you can make the filling. In the food processor , grind up the hazelnuts into as fine of a powder you can get them.
      2. Once they are ground, add in the remaining ingredients. If the mixture seems too thick, you can always add a bit more milk.
      3. Once the crusts are set, spoon the filling into each one and top with the fruit.
      4. Enjoy!

      by

      PB Cookie Dough Bites

      These little bites can be made in  minutes with just a handful of real ingredients.


      PB Cookie Dough 2 watermark


      Peanut butter and chocolate were just made for each other and these cookie dough bites are delicious!  This is a great recipe to make with your kids too.  My daughter had a lot of fun rolling these into balls and sticking the chips on.

      She was also trying to sneak in bites for herself as well.  🙂  I am a big fan of everything no bake.  Who isn’t? 🙂  These are the peanut butter version of my No Bake Cooke Dough Bites.

      PB Cookie Dough Bites

      PB Cookie Dough Bites

      Prep Time 10 min Serves 12 balls     adjust servings

      Ingredients

      • 1 cup peanuts
      • 1 cup gluten free rolled oats
      • 3 T maple syrup
      • 2 T peanut butter
      • 2 tsp vanilla extract
      • 1/4 cup water
      • 2 T chocolate chips

      Instructions

      1. In the food processor , blend up the peanuts and oats. 
      2. Once they are ground into a course consistency, add in the rest of the ingredients except for the chocolate chips.  You may need to soften the peanut butter slightly to get it to blend well. 
      3. Pulse until a dough starts to form. 
      4. Roll into balls and stick on the chocolate chips. 
      5. Place them in the fridge to set for about 30 minutes.  I got 12 balls out of my batch.  Enjoy!

      by

      Thick and Fudgy Brownies

      My husband is a huge chocolate lover.   He especially loves fudgy brownies.  I am more of a nut butter girl myself.  So I combined those two things to make these yummy thick and fudgy brownies!  This is attempt number 3 at brownies and these brownies came out so good!  I used white whole wheat in my brownie recipe, but they can easily be done with a gluten free flour as well.

      brownies FG 10

      These can also be done with peanut butter or sunflower butter as well.  I knew these were a hit because my daughter ate hers right up and asked for another.  My husband said they reminded him of Duncan Hines brownies in a box!.  Without the chemicals of course! I used dark chocolate and cacao powder so these are filled with healthy antioxidants for your body too. A brownie you can feel good about eating. Can it get any better than that really?

      Thick and Fudgy Brownies

      Thick and Fudgy Brownies

      Prep Time 15 min Cook Time 15 min Serves 10 brownies     adjust servings

      Ingredients

      Instructions

      1. Preheat oven to 350.
      2. In a large bowl , add all the dry ingredients.
      3. In a saucepan , on medium heat, combine the coconut oil, applesauce, maple syrup, almond butter and chocolate.
      4. Stir until everything is well combined. Set aside.
      5. Line an 8X8 pan with a sheet of parchment paper leaving enough room for some paper to come out the sides. This will make the brownies easy to remove.
      6. Add the heated mixture to the dry ingredients and stir only until combined.
      7. Lastly add the egg and milk and stir until everything is mixed well. Be careful not to over-mix or the brownies can come out tough.
      8. Bake in the oven for about 15 minutes. I kept mine slightly gooey and they worked out great that way. The first time I overcooked them and they were so dry.
      9. Once the brownies are cooled, pull them out by grabbing the parchment paper.
      10. Cut with a pizza cutter into squares.

      by

      Recipe Notes

      Store them in a container in the pantry or the fridge. Keep in mind, if you store them in the fridge, they will harden slightly because the coconut oil will solidify. I got about 10 brownies out of my batch. Enjoy!

      Pina Colada Ice Cream

      Summer is here and who doesn’t like a frozen treat?  I already have several up in my recipe index.  This pina colada ice cream is just a perfect addition.  The taste of pina colada reminds me of when I lived in Las Vegas.  We would go to the resort pool parties and sip on pina coladas.  Super yummy.  I found this recipe initially at The Midnight Baker’s website.  She made them into popsicles, but I turned them into ice cream.  You could do either.

      pina colada ice cream watermark blur

      If you don’t have an ice cream machine, you can make them into popsicles
      or smoothie pops.  Any way will work great!  We received a pineapple and some vanilla beans in our co-op basket so I used them in this recipe.

      Pina Colada Ice Cream

      Pina Colada Ice Cream

      Prep Time 15 min Serves 4-5 cups     adjust servings

      Ingredients

      • 1 can coconut milk (I used Thai Organic)
      • 1 frozen banana
      • 1 vanilla bean (whole) 1tsp extract would work well too.
      • 3 cups pineapple diced
      • 2 T liquid sweetener (optional)

      Instructions

      1. Throw all the ingredients in a blender and blend for about 90 seconds. Take a taste. It will be slightly tart. I liked it that way.
      2. You can also add 2 T of maple syrup or honey to sweeten it more if you like. I did not add any sweetener to mine.
      3. Pour contents into ice pop molds or an ice cream machine . Mine took about 20 minutes in the machine.
      4. The ice cream will come out like soft serve. If you prefer a harder ice cream, place in the freezer for 30 minutes to an hour to firm up. Enjoy!

      by

      Coconut Almond Fudge (Vegan and Paleo)

      Coconut Almond Fudge.  I thought I would never again enjoy a sweet bite of indulgent coconut fudge eating a clean and vegan diet. Who doesn’t like fudge?  It literally melts in your mouth with it’s velvety texture.

      The minute I had my first taste of coconut butter, I knew I could find a way to make it vegan AND clean. Introducing my Coconut Almond Fudge.  This fudge recipe is truly for coconut lovers!


      coconut almond fudge


      This coconut almond vegan fudge is so good.  If you like my Coconut Truffles, you will love these!  The best part?  They fit almost every diet.  They are grain free, gluten free and vegan.  If you have a nut allergy, you can try making them with sunflower butter.

      I am sure they would be great that way too!  I used chocolate molds to set my fudge, but mini muffin cups would work great too!  If using mini muffin cups, please use a paper or silicone wrappers so they can be easily removed.

      Looking for more fudge recipes?

      Coconut Almond Fudge

      Coconut Almond Fudge

      Prep Time 10 min Serves 15     adjust servings

      Coconut and almonds that go beautifully to create a fudge that melts in your mouth.

      Ingredients

      Instructions

      1. In a saucepan , combine all the ingredients.
      2. Stir on medium heat until everything is combined.
      3. Pour into molds and store in the fridge to set.

      by

      Recipe Notes

      These should take 1-2 hours to set up in the freezer. Enjoy!