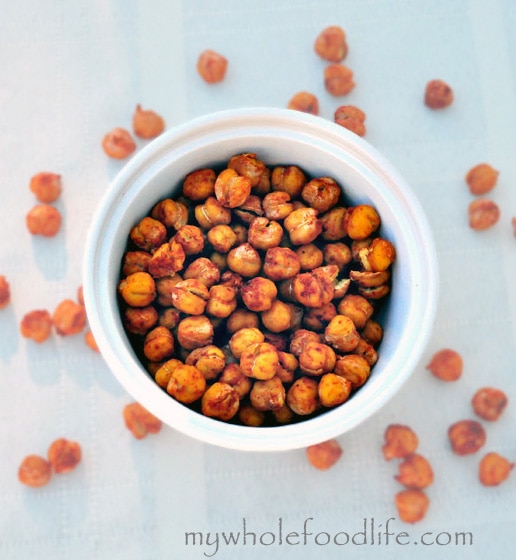
Smokey Roasted Chickpeas

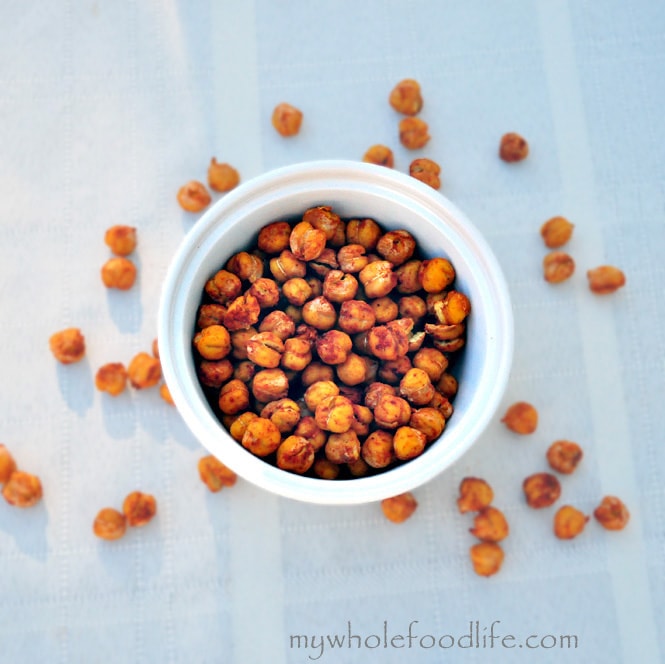
Sometimes in the late afternoons, I get an urge to snack.  Roasted chickpeas are a great, healthy snack alternative.  They can be done sweet or savory.  I made a sweet version with my Maple Cinnamon Chickpeas.  This is a savory option.

Smokey Chick Peas watermark

I am warning you, these are highly addictive!  They are very easy to make.  If you don’t eat them all at once, you can store them in a container with rice scattered at the bottom.  The rice will help absorb the moisture and keep them crispy.  In addition to the spices I list, you can also add a pinch of cayenne if you like some extra heat.

For a sweet version of roasted chickpeas, check out this video.

Smokey Roasted Chickpeas

Smokey Roasted Chickpeas
Prep Time 10 min Cook Time 60 min

Ingredients

Instructions

  1. Preheat oven to 350.
  2. In a bowl, mix all of the ingredients.
  3. Make sure all beans are coated well with spice.
  4. Line a baking sheet with parchment paper .
  5. Bake for about 40-60 minutes, stopping to shake the pan every 15 minutes.
  6. Wait until beans are completely cooled before storing.

by

Recipe Notes

I store mine on the counter in a glass mason jar . This makes about 4 servings. Enjoy!

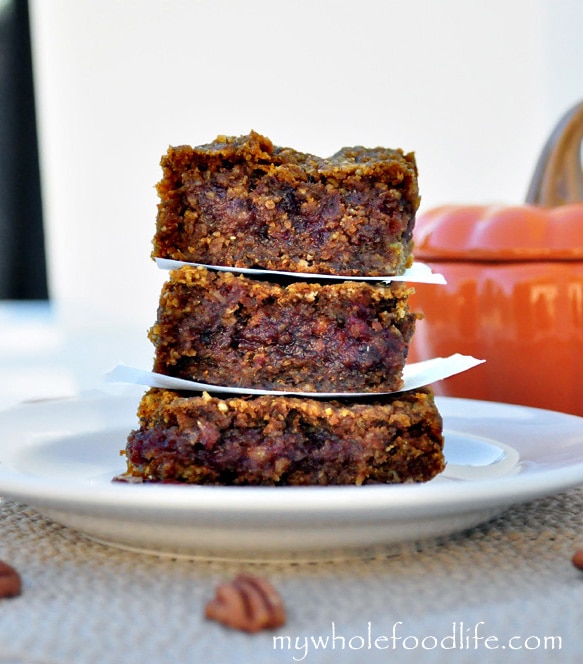
Pumpkin Pecan Caramel Bars

Pumpkin Pecan Caramel Bars.  Time for another pumpkin treat.  These pumpkin pecan vegan caramel bars are moist, gooey and totally delish!

If brownies and pumpkin had a baby, this would be it.  In fact they kind of reminded me of my Grain Free Blondies. If you are in need of a great dessert bar recipe, these pumpkin bars are a must-try.


Pumpkin Pecan Caramel Bars


They also happen to be gluten free.  Perfect for those Thanksgiving parties.  You can make these up pretty quickly too.  They would also be fabulous with my Pecan Caramel Ice Cream.  Yum!

Looking for more healthy pumpkin recipes?

Pumpkin Pecan Caramel Bars

Pumpkin Pecan Caramel Bars

Prep Time 20 min Cook Time 40 min Serves 9 squares     adjust servings

Ingredients

    For the bars

    For the caramel

    Instructions

    1. Preheat oven to 350.
    2. In a food processor , combine the dates and water and pulse until you get a caramel consistency. You will need to scrape down the sides a few times. Once that is done, set it aside.
    3. In a food processor or blender, grind up the pecans and oats into a course consistency.
    4. Add that to a bowl with the remaining dry ingredients and mix well.
    5. In another bowl, combine all the wet ingredients and mix well.
    6. Add wet to dry and mix until combined.
    7. Get a sheet of parchment paper larger than an 8X8 glass baking dish so you will have some extra paper sticking out the sides. This will make these easy to remove after they are baked.
    8. Slowly spoon 1/2 the batter into the 8X8 pan. Then add a layer of the “caramel.” Lastly, add in the remaining batter.
    9. Bake in the oven for about 30-40 minutes. I got 9 squares out of my batch and I stored them in the fridge. You can also freeze them! Enjoy!

    by

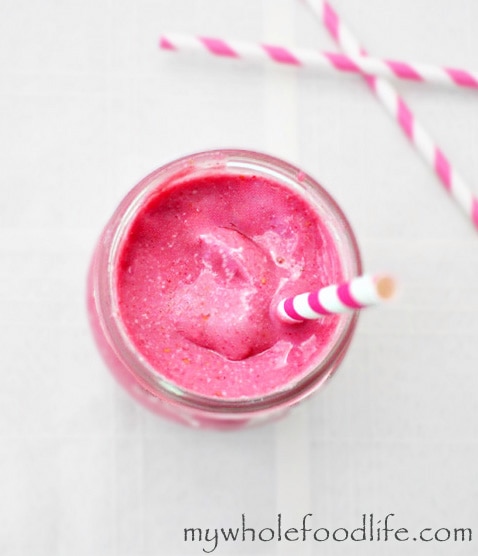
    Raspberry Coconut Smoothie

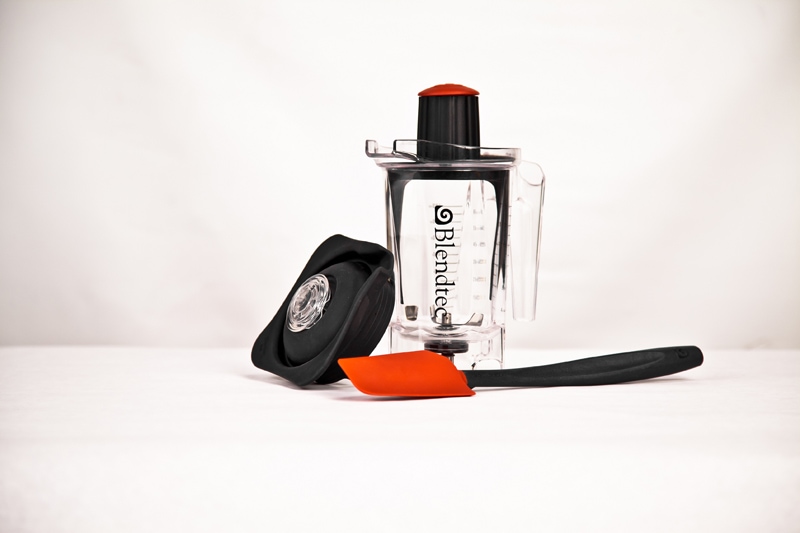
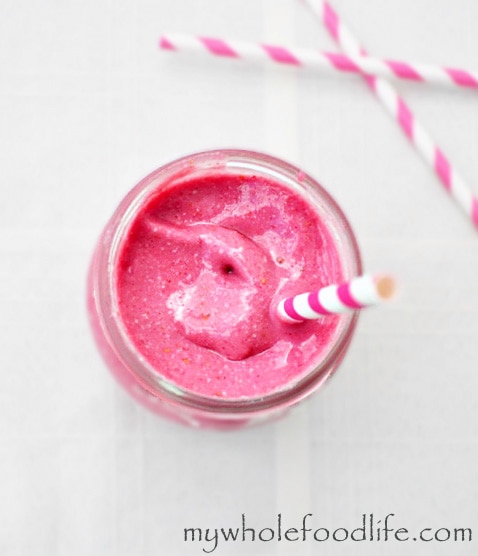
    It’s giveaway time again.  I know many of my recipes require a blender, so I wanted to be able to give you an opportunity to win one.  I contacted Blendtec and they gave me a Blendtec blender to review and another to give away.  This blender is awesome.  I especially love how wide the pitcher is.  Makes for very easy cleaning.  I whipped up this smoothie in no time at all.  In fact, there are set modes on the blender so you can just press a button and walk away.  Great for all us moms out there who are trying to keep up with the kids as we cook.

    Coconut-Raspberry-Smoothie-Watermark

    The Blendtec blender available for giveaway is their Black Designer Series + a Twister Jar.  A $570 value to one lucky reader!  Contest is open to US and Canada residents only.

    TBDS on White LRD-Jun28-12-10 copy
    twister jar


    Not only have I made this smoothie with it, but I have also used it to grind oats into flour, and make soup.  It handled every job beautifully.  The twister jar is great because it can tackle the smaller jobs like hummus and almond butter.

    a Rafflecopter giveaway

    Raspberry Coconut Smoothie

    Raspberry Coconut Smoothie

    Prep Time 5 min

    Ingredients

    • 2 cups raspberries (I used frozen, but fresh will work too)
    • 2 frozen bananas
    • 4 T coconut butter (shredded coconut work work too)
    • 1 1/2 cups coconut milk
    • 1 T chia seeds

    Instructions

    1. Throw all ingredients in the blender and blend for about 60-90 seconds. 
    2. With the Blendtec, you just hit the smoothie button and it does the rest.

    by

    Recipe Notes

    If you plan on drinking 1 serving and saving the rest, pour the remaining smoothie into ice cube trays and freeze for quick blending on another day. Enjoy!

    Chocolate Almond Banana Bites (Vegan)

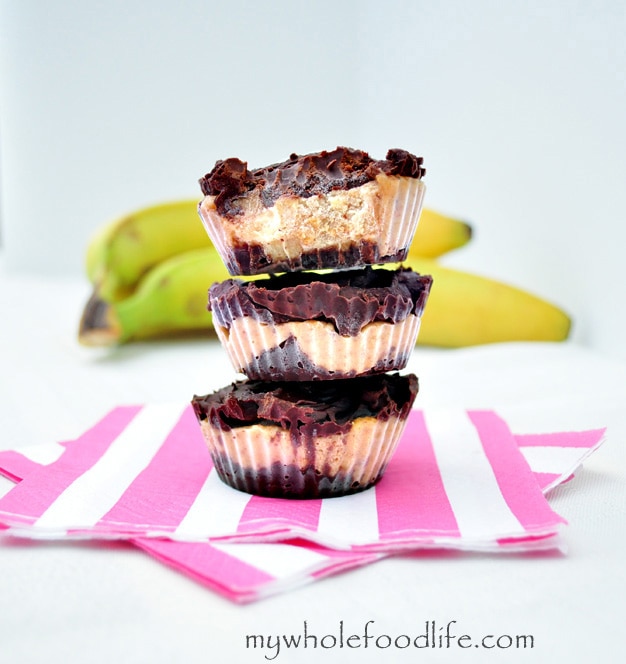
    Chocolate Almond Banana Bites.  These chocolate almond frozen banana bites are so good! I wanted to incorporate the flavors of my 5 minute banana ice cream, which I seem to make at least a few times a week.

    These frozen chocolate treats are so healthy and it feels like you are cheating!  No ice cream maker necessary!

    This recipe actually won a contest on The Today Show.

    Chocolate Almond Banana Bites

    These chocolate almond banana bites contain no added sugars, except for the small amount of sugar in the dark chocolate.   They are a great banana chocolate dessert to keep in your freezer when you have that sweet craving.

    I used standard sized muffin cups to make mine, but you can also use mini cups and make a larger, bite-size batch.

    Looking for more frozen treats?

    Chocolate Almond Banana Bites

    Chocolate Almond Banana Bites

    Serves 6     adjust servings

    Satisfy your sweet tooth with this healthy treat!

    Ingredients

    Instructions

    1. In a small bowl, mix the banana, vanilla and almond butter.
    2. Mash it together well and set aside.
    3. In a saucepan, , melt the chocolate and almond milk on medium heat, stirring constantly.
    4. Once you get a smooth chocolate, add a small amount to the bottom of a lined muffin tin.
    5. I used silicone muffin liners to make removing the chocolate easier when it’s time to eat.
    6. Once you have placed chocolate at the bottom on each cup, stick it in the freezer to firm up. About 10 minutes.
    7. Once the chocolate is firm, add in the banana filling and then cover the top with more chocolate.
    8. Repeat these steps until all are done.

    by

    Recipe Notes

    Using standard sized muffin cups, I got 6 out of my batch. I store them in the freezer. Enjoy!

    Pumpkin Enchiladas

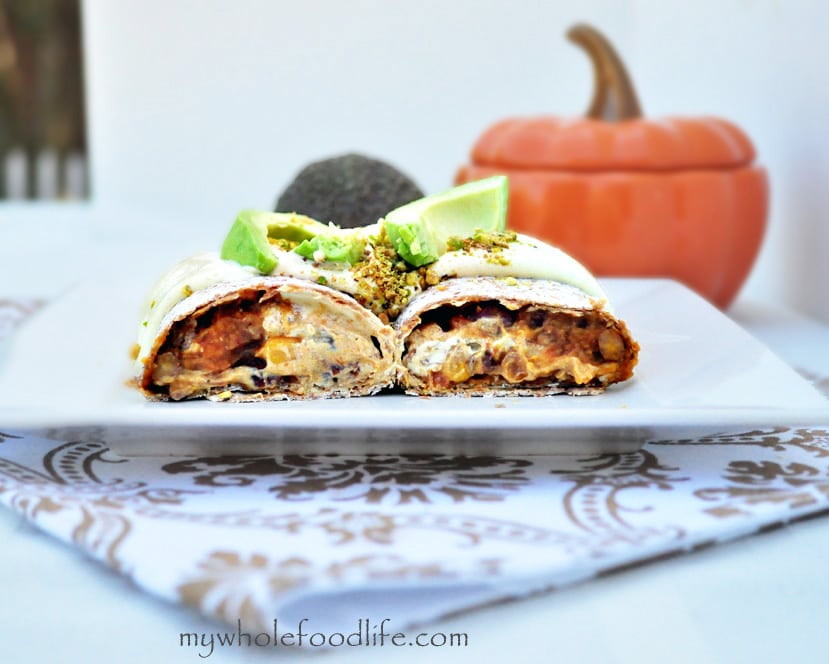
    Melissa let me guest post on this recipe. I’m responsible for a lot of the savory dishes on the site and while they don’t get as much attention as my wife’s amazing sweet treats, “we all gotta eat.” I’ve been wanting to try a savory pumpkin dish for the fall, and this recipe just popped in my head one day so here it is: Pumpkin Enchiladas. This pumpkin enchiladas recipe is a bit involved, but well worth it.

    pumpkin enchiladas watermark

    We used a dairy free cheese sauce for this recipe, so these enchiladas are vegan. 🙂  I hope you enjoy them as much as we do!

    Pumpkin Enchiladas

    Pumpkin Enchiladas

    Prep Time 9 hr Cook Time 40 min

    Ingredients

      The Filling

      • 4 cup black beans (measured after soaking) This also equals about 2 cans.
      • 2 cup pureed cooked pumpkin
      • 1 sweet potato chopped
      • 6-8 vine ripened tomatoes chopped
      • 2 cups corn (please try to buy this organic)
      • 1/2 cup veggie broth
      • 2 tsp garlic powder (or 3 to 4 cloves minced)
      • 1 tsp chili powder
      • 1 tsp onion powder
      • 1/2 tsp cayenne pepper
      • optional: 1 jalapeno diced, seeds and all

      The Enchilada

      • (Per each one)
      • 1 tortilla
      • 3 heaping spoonfuls of filling
      • Cheese sauce
      • 1 T pistachio dust per enchilada (pistachios that have been processed into a course consistency)
      • 1-2 T diced raw red onions

      Instructions

        For the filling

        1. I soaked the black beans the night before.
        2. I also roasted my own pumpkin and pureed it myself, but pureed pumpkin in a can would also work.
        3. Add everything to the crock pot .
        4. Turn on high and walk away for 6-8 hours or so.
        5. To put together the enchilada, pick a tortilla of your choice, lay it flat, and put three good sized spoon fulls of the filling slightly off-center in a line. We used Food for Life tortillas.
        6. Next add the cheese sauce . I didn’t put an amount because really this is personal taste. Add as much to your heart’s cheese-loving content. We used our cashew cheese sauce , but you could also use real cheese.
        7. Lastly, add the red onion.
        8. Wrap the filling in the tortilla like you would a burrito or a sandwich wrap.
        9. Next, add some more cheese sauce on top.
        10. Finally, add your pistachio dust on top of the cheese sauce .
        11. I did several at once in an 8X8 baking dish and put it in the oven for five minutes or so.
        12. Remove and you are done.

        by

        Recipe Notes

        A tip on the filling: I did this part at night. I woke up to the most amazing smelling house. For some real heat, you can also throw in a jalapeno to really give this filling some kick. Melissa doesn’t like much spice, so I left that out of my recipe.

        The filling makes for an awesome pumpkin chili to gorge on. The pistachio dust is essential to this recipe. You can just buy pistachios and food process them until they are course. Real simple.

        Lastly, for a real cheese option, try this: melt 1 tbsp butter, 1 tsp flour- stirred till the flour smell was gone added dash of nutmeg, salt, pepper, 1/2 cup milk, whisked so it won't form lumps and once thick took off the stove and put in 1/4 cup cheese.

        I hope you enjoy. I know I sure did.

        Vegan Pistachio Truffles

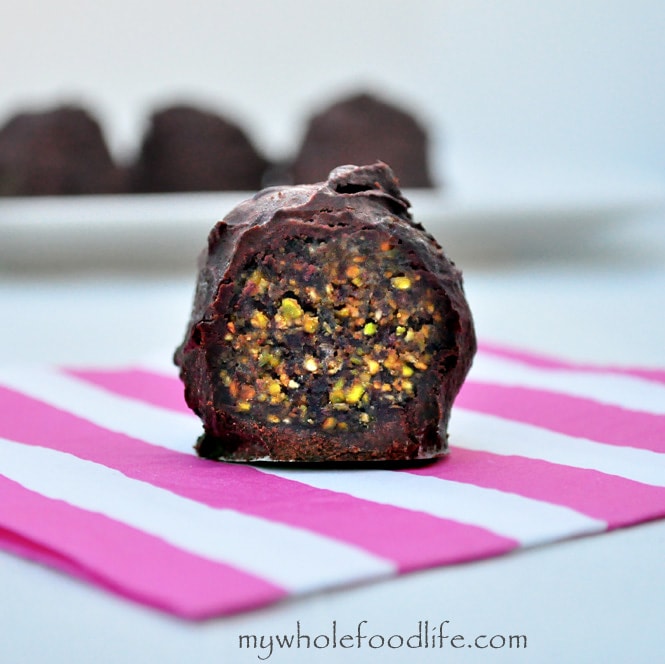
        I love pistachios!  How about you?  I swear my daughter could put away a whole bag of pistachios if she didn’t have to shell them.  We bought a bag the other day and I instantly thought about doing a pistachio truffle recipe.  So that is how these pistachio truffles came about.

        Pistachio Truffles Watermark

        These truffles are date sweetened except for the small amount of sugar there is in the dark chocolate I used.  They are pretty awesome too.  Kind of reminds me of my coconut truffles a bit.  It’s a great little bite when you have a chocolate craving.  These truffles are also vegan, gluten free and paleo.

        Pistachio Truffles

        Pistachio Truffles

        Prep Time 1 hr Serves 8-10 truffles     adjust servings

        Ingredients

          For the filling

          For the chocolate coating

          Instructions

            For the filling

            1. In the food processor , pulse the pistachios into a course ground consistency.
            2. Then add the remaining ingredients until a “dough” starts to form.
            3. Roll into balls and place in the freezer to set. I put mine on a parchment lined plate. Leave them in there for about 30 minutes.

            For the chocolate coating

            1. While the balls are setting, make the chocolate coating.
            2. Using a double boiler method, melt the chocolate, coconut oil and milk.
            3. Keep stirring until the chocolate becomes thinner and smooth.
            4. Once the chocolate is ready, remove from heat and get the balls out of the freezer.
            5. Using two forks, gently roll the balls into the chocolate and set them back on the parchment lined plate.
            6. Once all the balls are coated, place them back in the freezer to firm up.
            7. They should be ready in about 30 minutes.

            by

            Recipe Notes

            You can store them in the fridge or freezer. Whichever is your preference. I got about 8-10 balls out of my batch. Enjoy!